
How to Create a Job Using Jenkins Pipeline?
In this blog you will learn how to integrate Jenkins with your maven project using the Jenkins pipeline and schedule the job.
Pre-Requisite:
- Jenkins must be installed in your system.
- Run Jenkins in your system by writing the below command in cmd.
(Note: Open cmd in a location where you kept your Jenkins. war file) java -jar Jenkins.war
- Create a maven project with which you want to integrate Jenkins.
Steps to Integrate
Following Steps should be followed to do the integration:
1) Create a New Pipeline Project in Jenkins for that follow the steps mentioned below:-
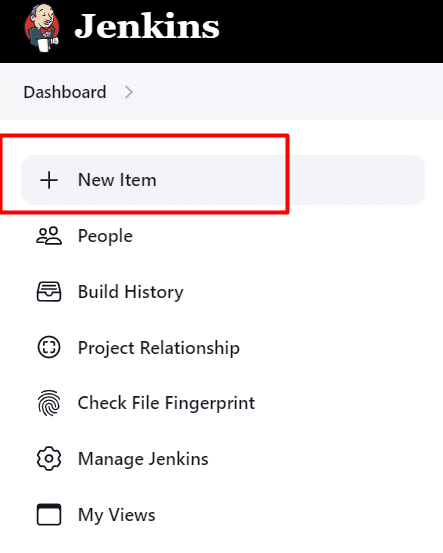
- Click on New Item
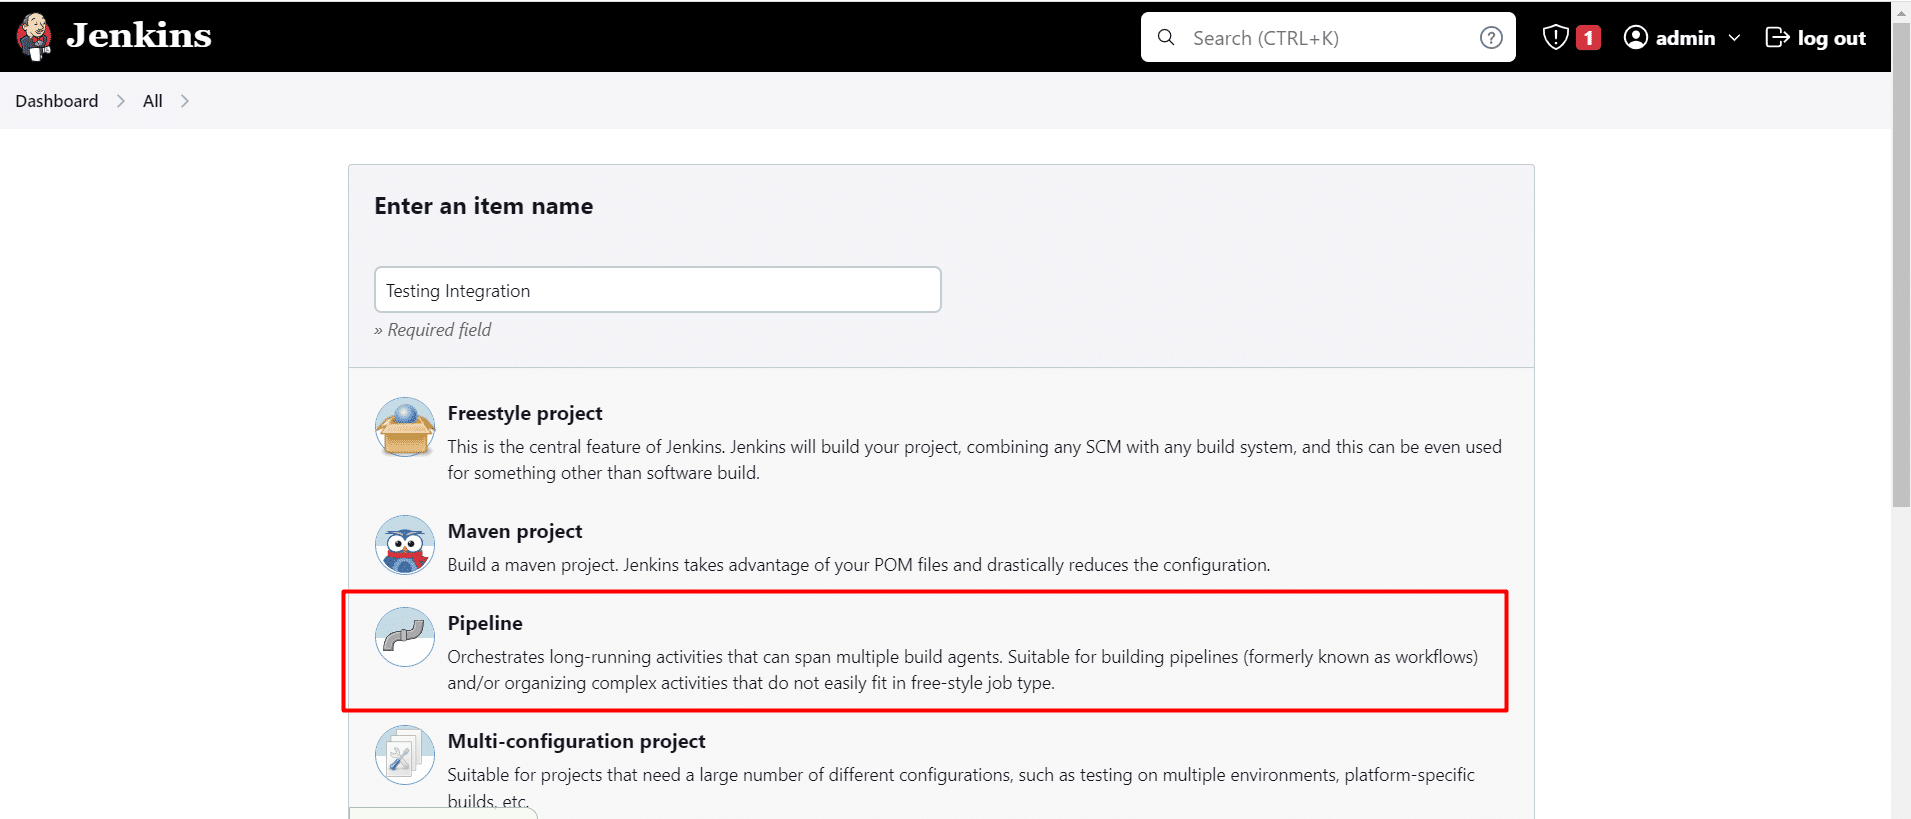
- Enter the name of the project in the item name field.

- Click on Pipeline
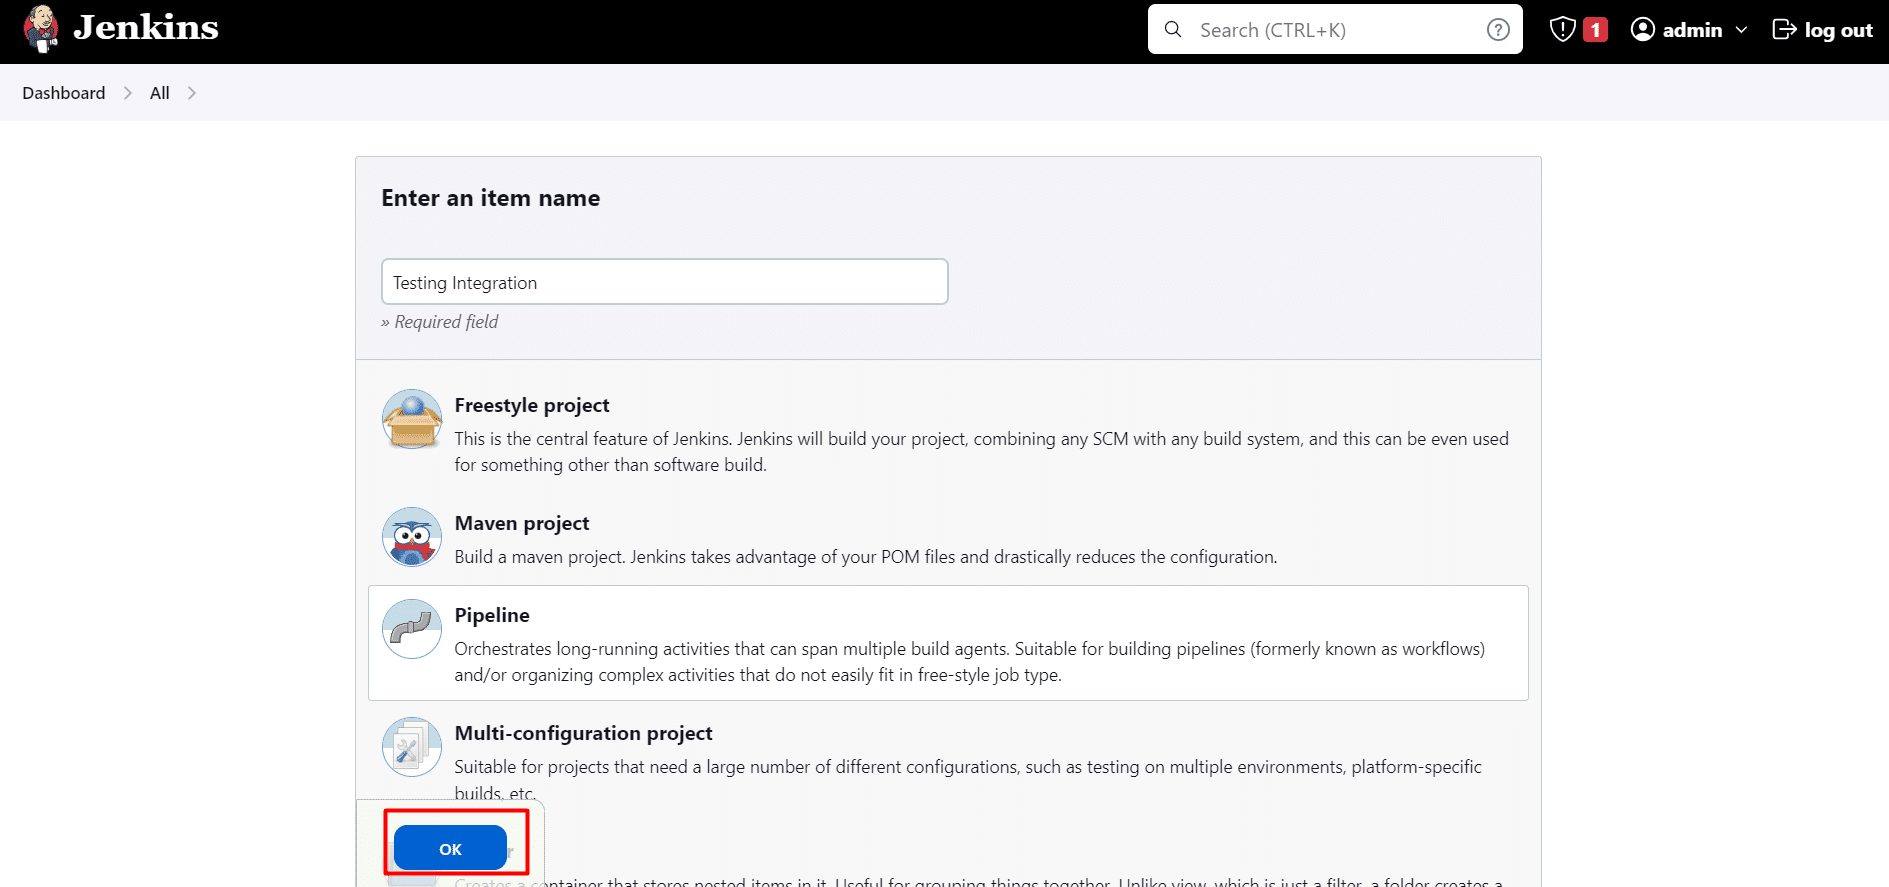
- Click on the OK button. The configuration page will appear
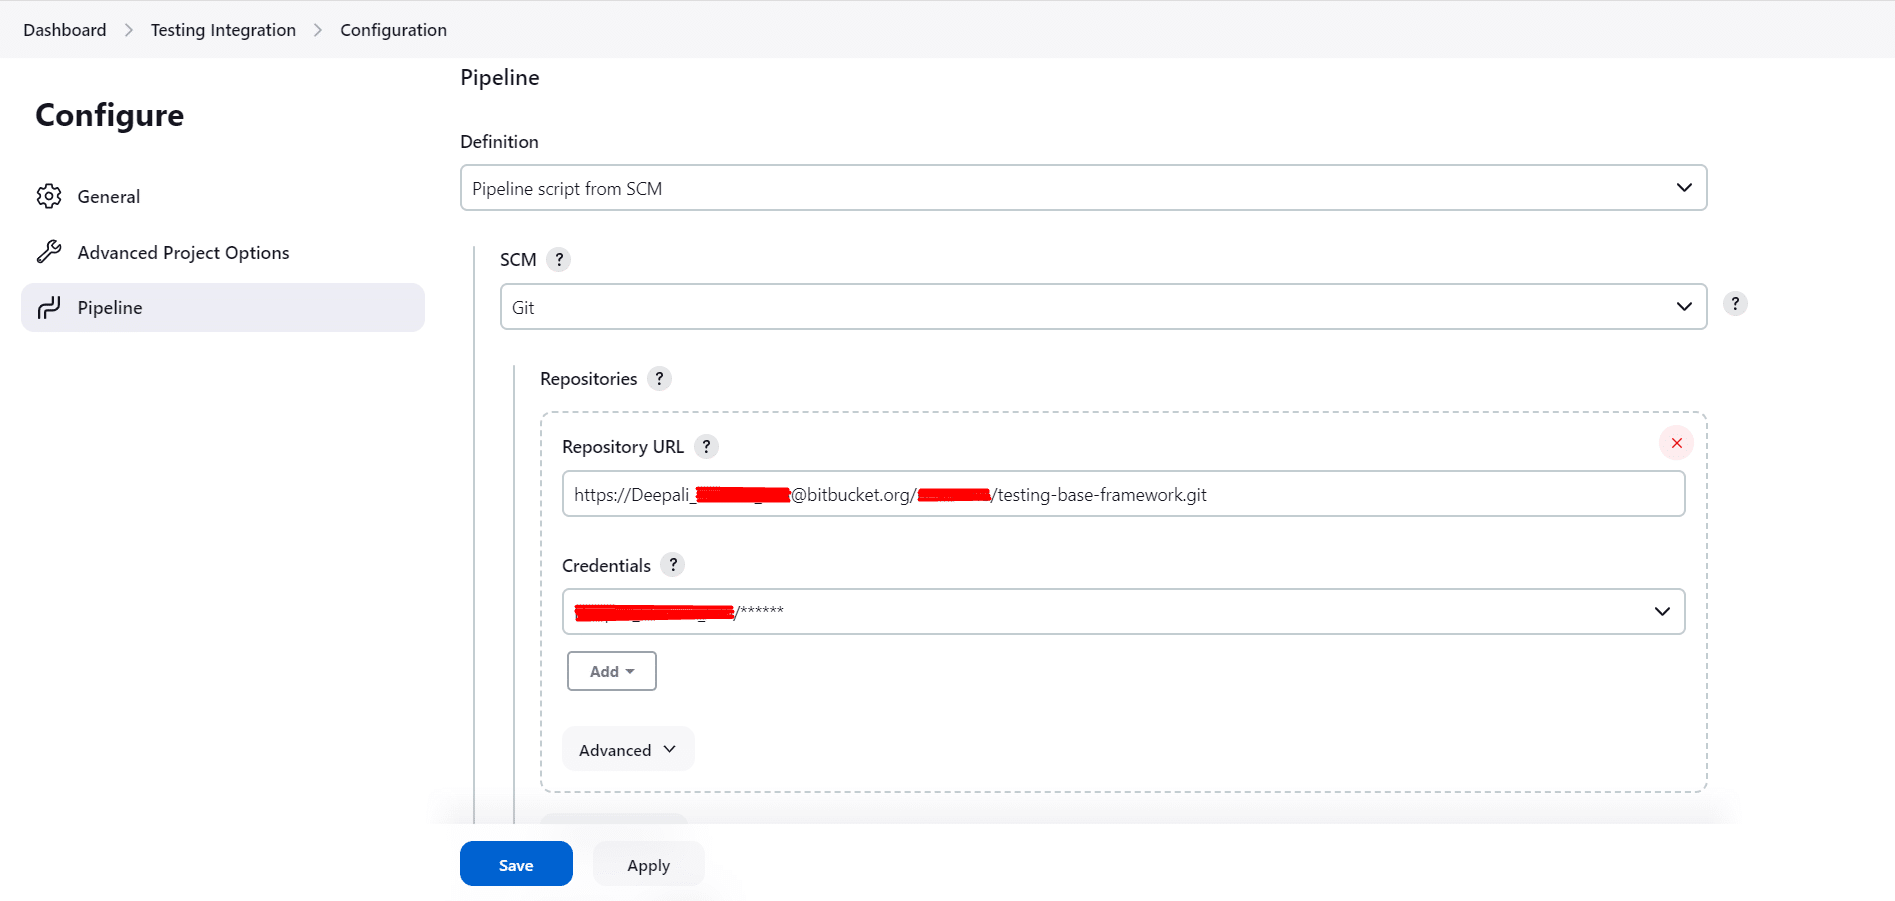
2) Scroll down the page till Definition section under Advanced Project Options
3) Select “Pipeline script from SCM” from Definition drop down.
4) Under SCM select Git from the drop down.
5) Give your Git Repository URL and Credentials needed to log in to GitLab/GitHub.
Note: By using f, g and h steps Jenkins clone Git Repository locally.
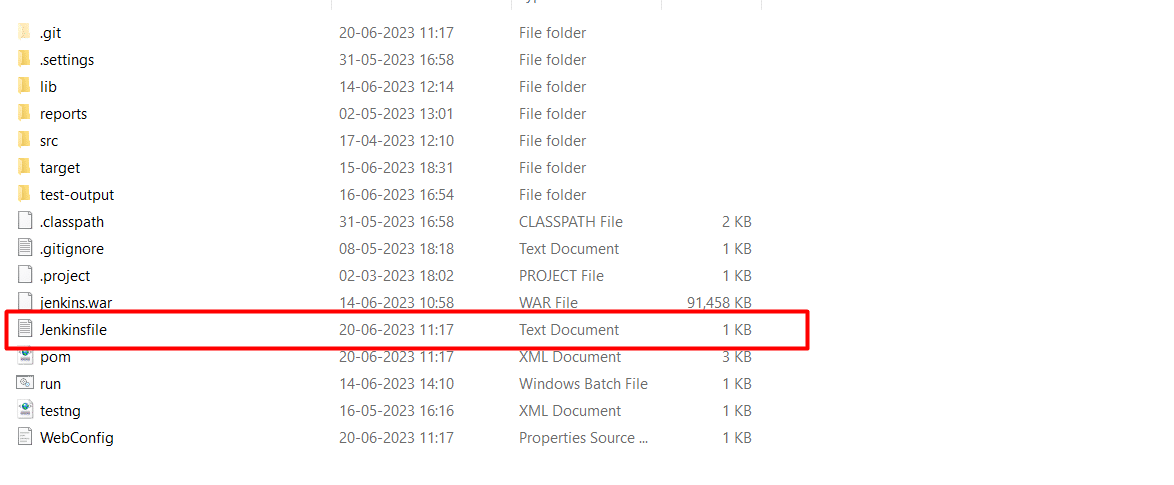
6) Type the below text in a notepad file and save this file with txt at location where you have cloned your git project locally.
pipeline {
    agent any

    stages {
        stage('Test') {
            steps {
                bat "mvn -D clean test"
            }
post {
                // If Maven was able to run the tests, even if some of the test
                // failed, record the test results and archive the jar file.
                success {
                   publishHTML([
                       allowMissing: false,
                       alwaysLinkToLastBuild: false,
                       keepAll: false,
                       reportDir: 'target/surefire-reports/',
                       reportFiles: 'emailable-report.html',
                       reportName: 'HTML Report',
                       reportTitles: '',
                       useWrapperFileDirectly: true])
                }
            }
        }
    }
}
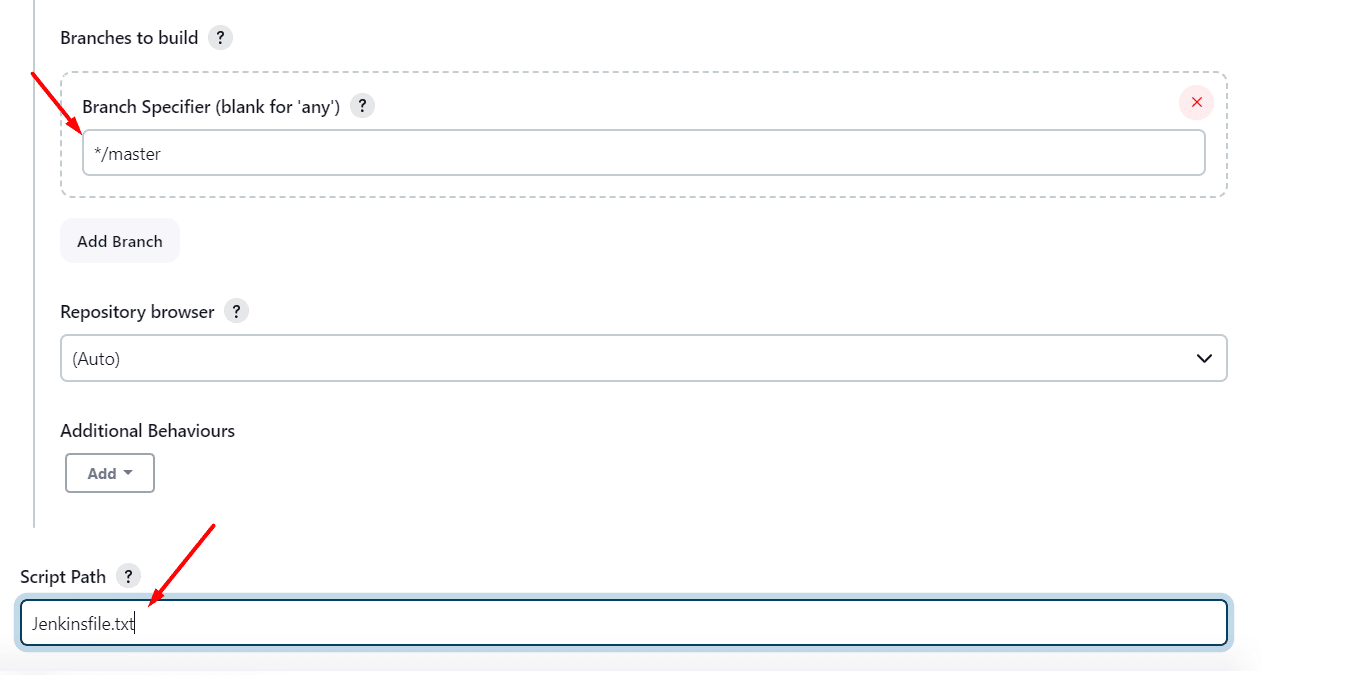
7) Specify branches to build a section under Repositories in Jenkins pipeline and click on Apply and Save buttons.
- Branch Specifier – */master (This is my main branch)
- ScriptPath – Jenkinsfile
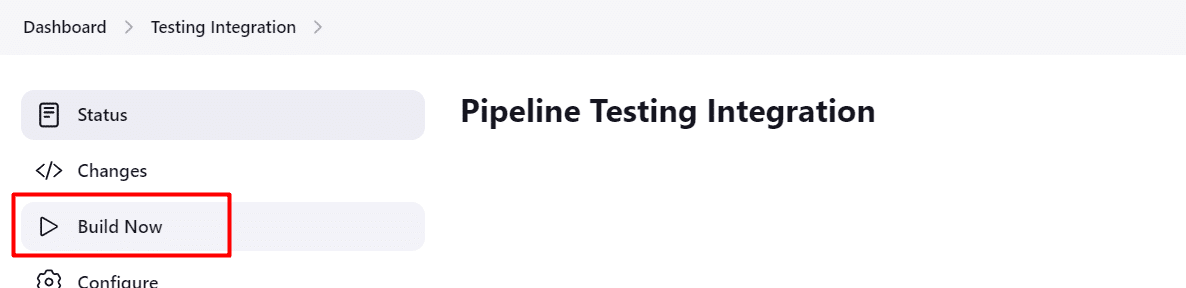
8) To execute the created Job you have to click on Build Now
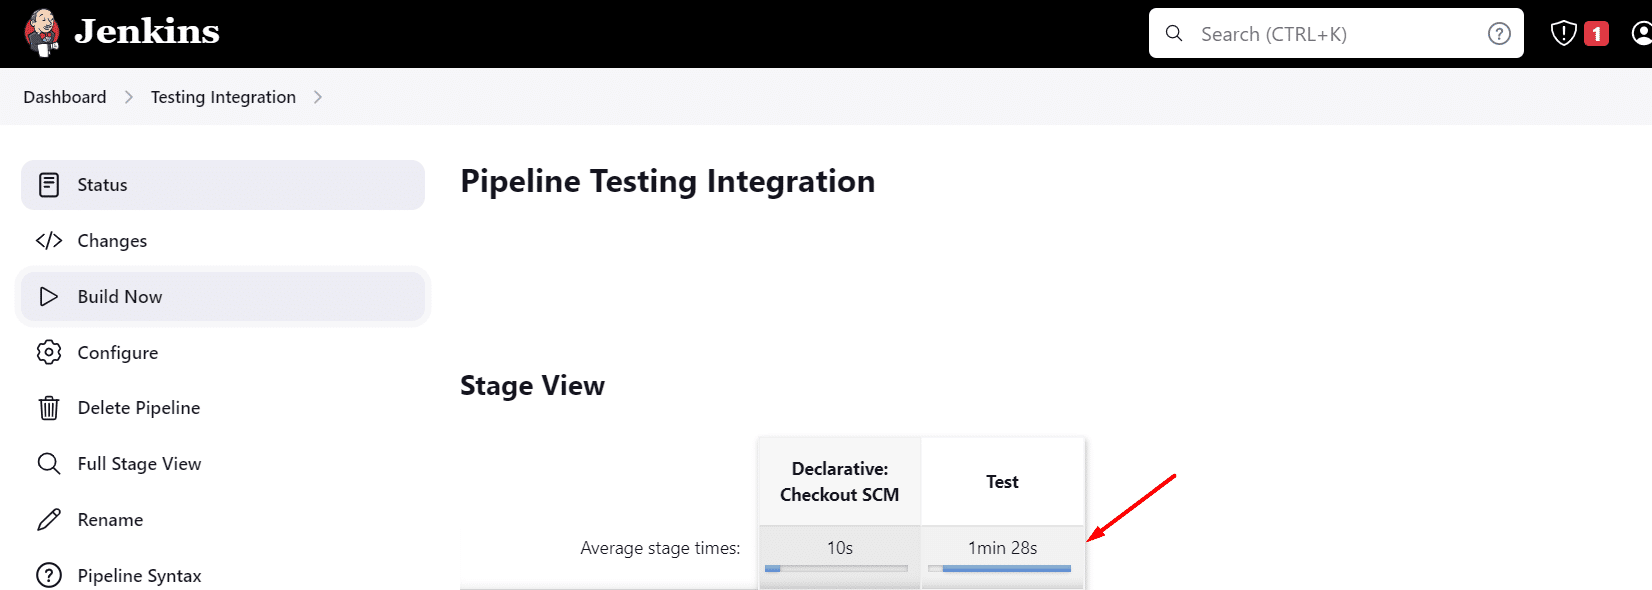
9) Your execution will be started
10) Click on Pipeline Steps to see the pipeline steps
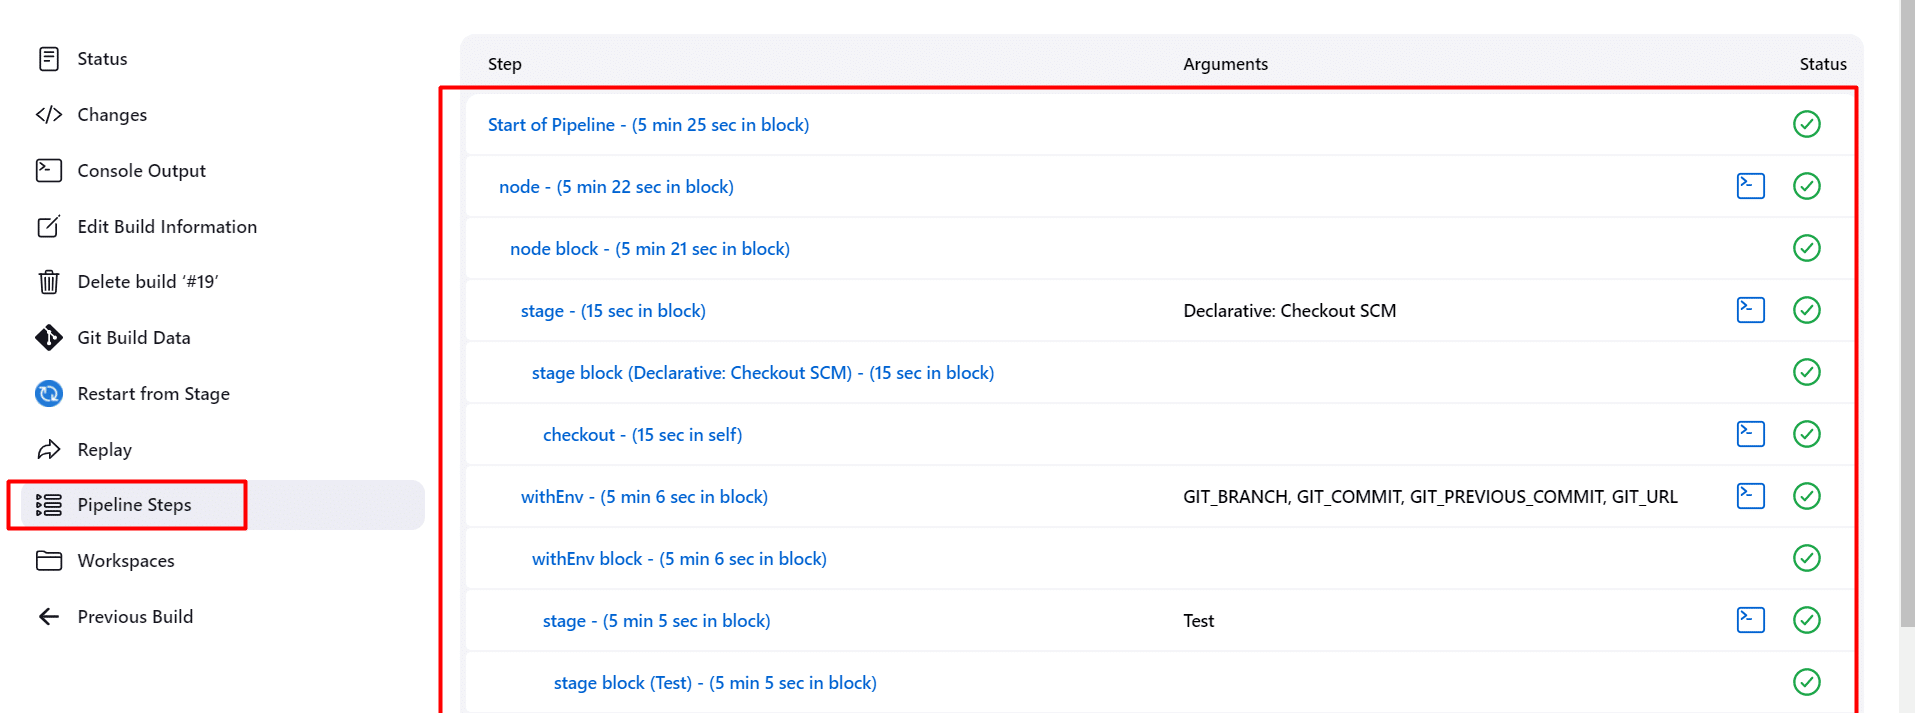
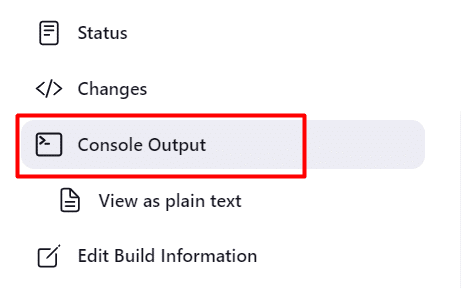
11) You can see the results of the execution by clicking on Console Output

Good to read:- How to Setup Jenkins and Integrate NUnit Selenium C#
How to Schedule Your Job to Run Everyday?
- Click on Build Triggers under Configure.
- Click on Build periodically checkbox.
- Give time in the following format “H 10***” it will run your job every day at 10:26 am.
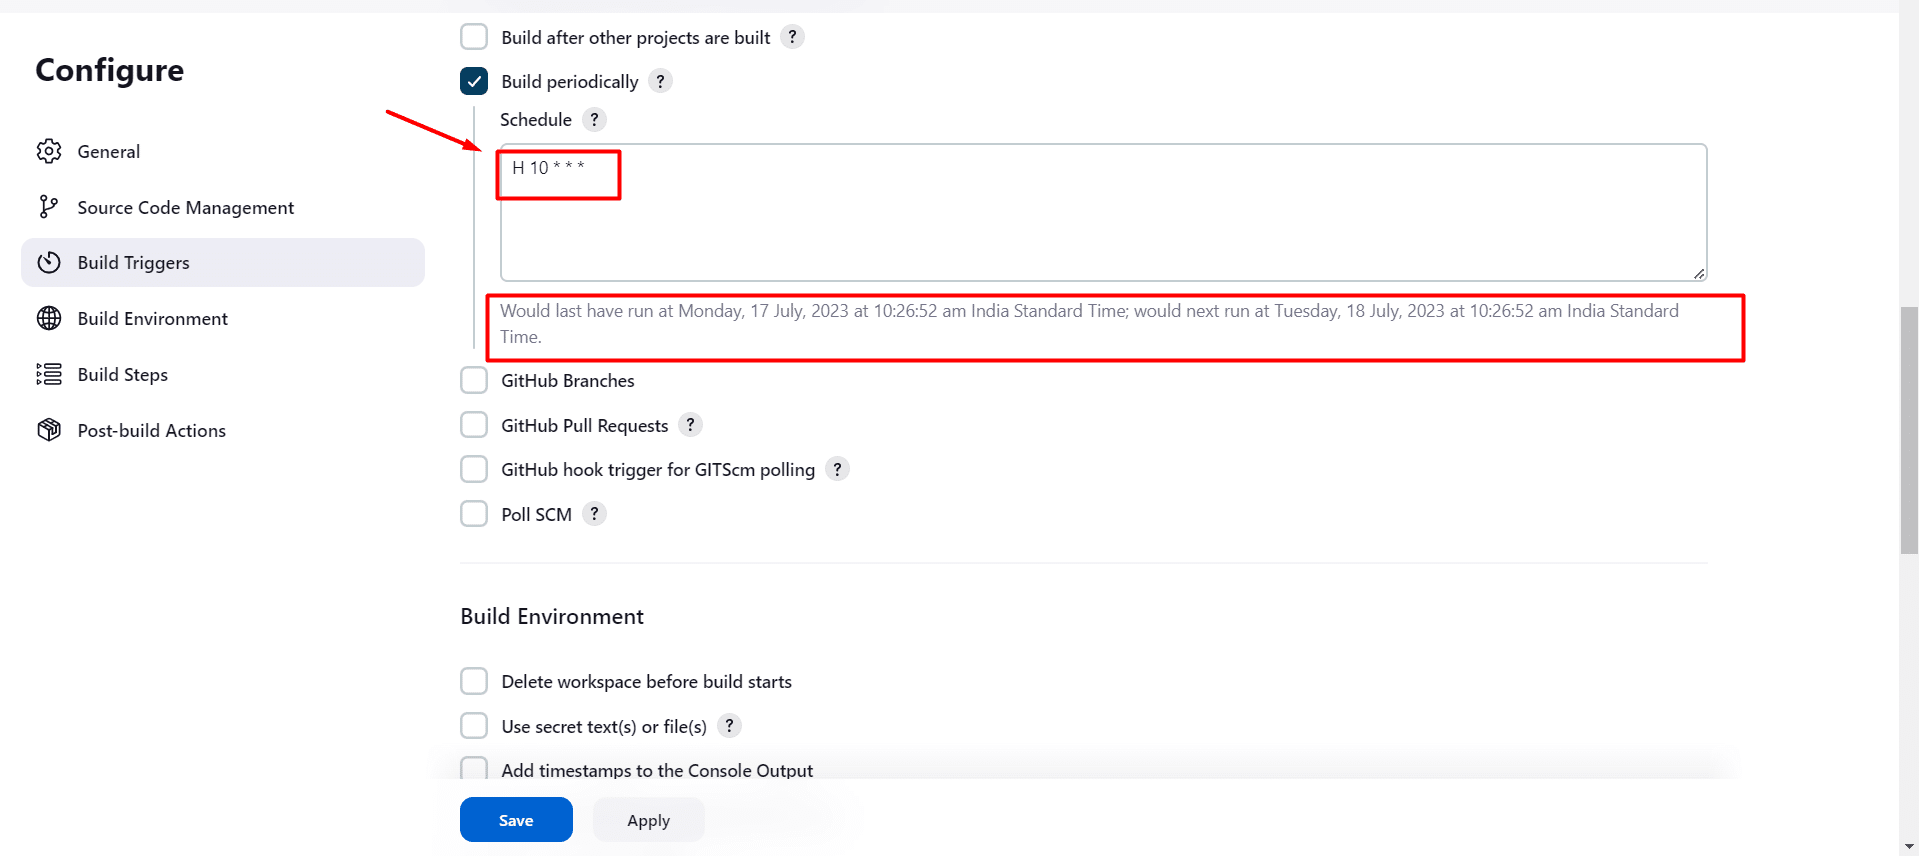
- Click on Save
Below are few examples which helps you to schedule your job as per your requirement.
| Schedule Time | Job |
|---|---|
| * * * * * | Run job every minute |
| H 13 * * * | Run job every day at 1pm |
| H 0 * * * | Run job every day at midnight |
| H 10 * * 1 | Run job every Monday at 10 am |
| H 0 1 * * | Run job on First day of every month |
So here first ‘*’ is used to define minutes, Second ‘*’ define hour, Third ‘*’ define day of every month, Fourth ‘*’ define year. So as per the examples shown in the table you can schedule the job as per your requirements.
I hope this article will help you to setup up and schedule your job in Jenkins.


