
What is a Brute Force Attack?
An application program can utilize a brute-force attack as a trial-and-error technique to decode encryption Keys and login credentials to access systems without authorization. Rather than using clever tactics, applying brute force is a laborious endeavor.
A brute-force attack on an application tries every possible combination of characters that are allowed in a sequence, much like a thief could try numerous combinations to get into and crack a safe.
Cyberattackers usually execute a brute-force attack to get into a network, account, or website.
Automated tools are often used in a basic brute-force attack to attempt every password until the right input is found. This is an outdated but still powerful attack technique for figuring out -popular passwords.
What are the different types of Brute-Force Attacks?
1) Credential Stuffing
Credential stuffing happens when an attacker attempts to access several systems using the same username and password combination after compromising a user account.
2) Reverse Brute Force Attack
The attacker first gains access to the network and data by using a common password or one they already know against several usernames or encrypted To determine the proper username, the hacker will next apply the same method as in a standard brute-force attack.
3) Dictionary Attack
Another kind of brute-force attack is a dictionary attack, in which every word in a dictionary is searched for a password. To break longer passwords, attackers can add characters, digits, and other elements to words.
How to Prevent Brute Force Attack?
- Increase password length
- Increase password complexity
- Limit login attempts
- Two Factor Authentication (2FA)
- Use OTP
What is OWASP Zed Attack Proxy (ZAP)?
Developers, pen testers, and beginners all frequently use OWASP ZAP, an open-source web application security tool. The ZAP project is recognized as one of the best projects that is actively maintained by a global network of security researchers. To check for vulnerabilities, it proxies HTTP traffic and permits inspection, modification, and resending of that data. Other capabilities of ZAP include Passive Scanner, Fuzzer, which does automated scans and spider web applications, and many more.
How to Setup ZAP?
- First, download the ZAP from here https://www.zaproxy.org/download/
- Execute the installer
- Open ZAP when the installation is finished and review the license terms. If you agree to the terms, click Agree. ZAP will install itself and launch automatically after that.
Configure ZAP Proxy Setting
You will be asked to continue the ZAP session when you first launch it. ZAP sessions are automatically stored on a disc in a database with an assigned name and location. When you exit ZAP, such files are erased if you choose not to persist the session. Click Start after selecting No, I do not want to persist this session at this moment in time. ZAP sessions won’t continue for the time being.


Configure the Proxy Setting in the Web Browser Firefox
The port number should match with Port Number in ZAP Proxy Settings. Here ZAP Proxy port number is 8080.

BruterForce WebLogin
Let’s use brute force to obtain credentials from a form. Let’s see if we can use Zap to launch a Brute-Force attack to obtain credentials although we already know it. The username is – Admin, Password is – Admin

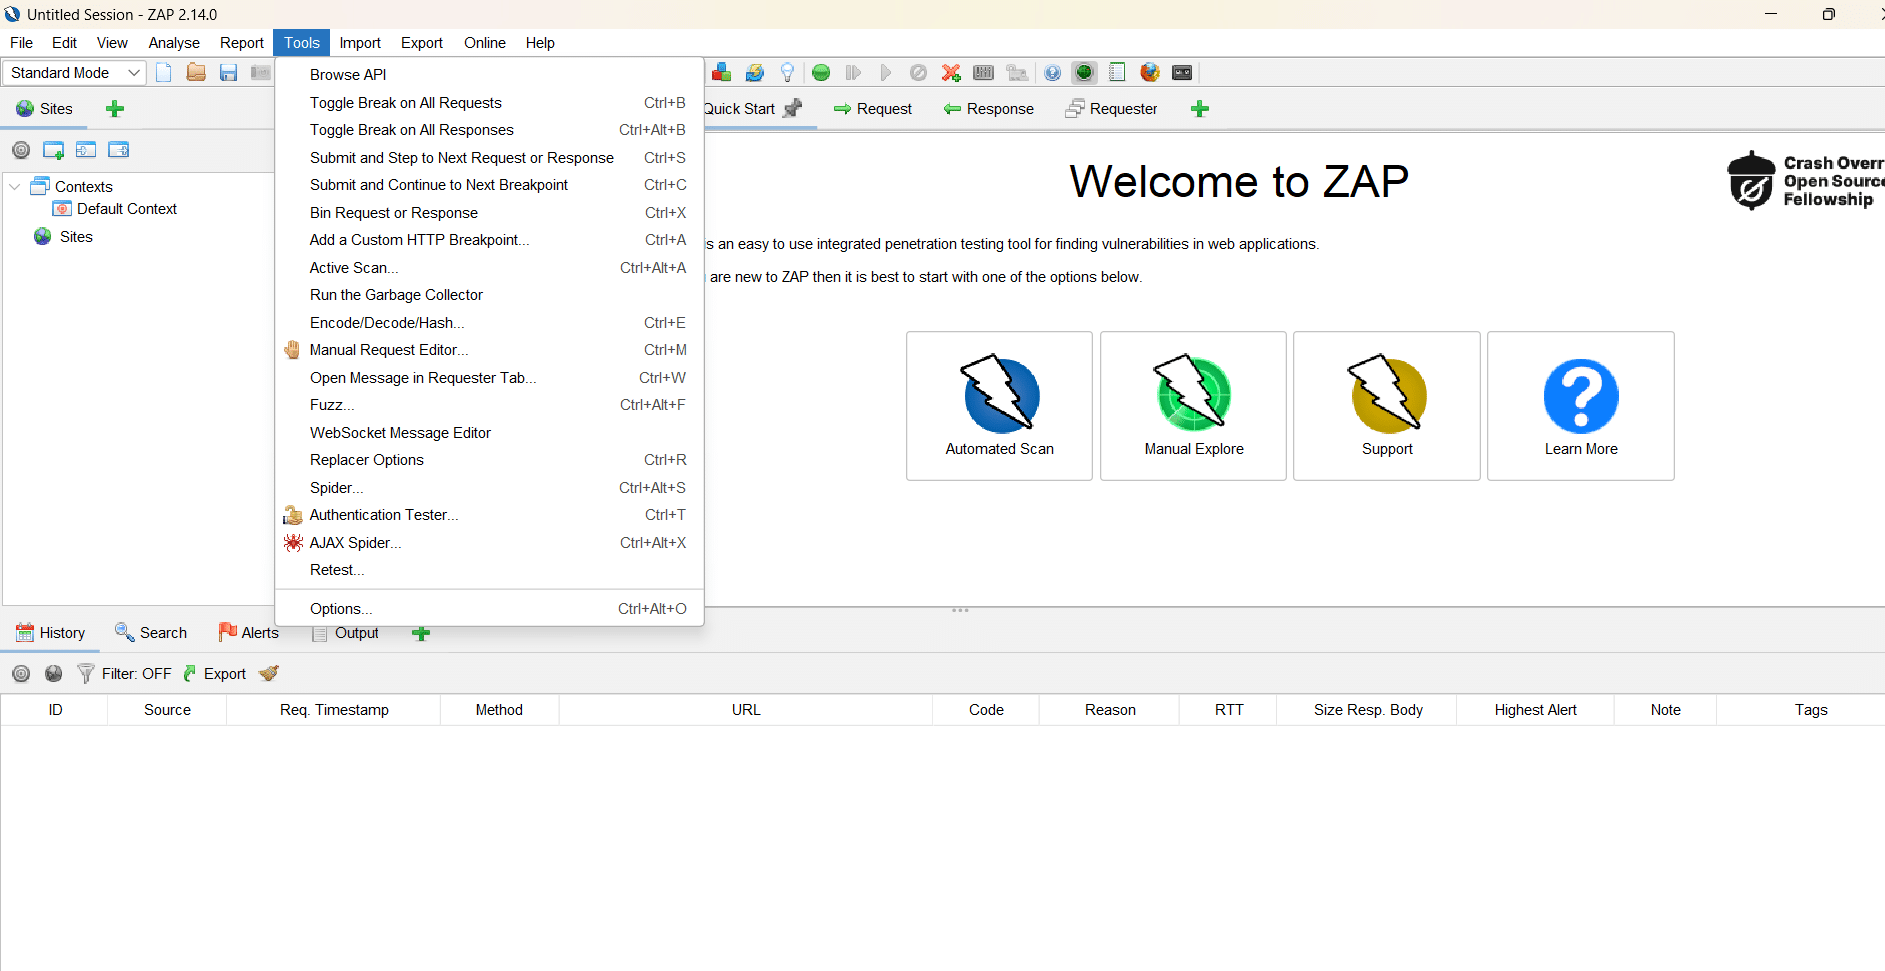
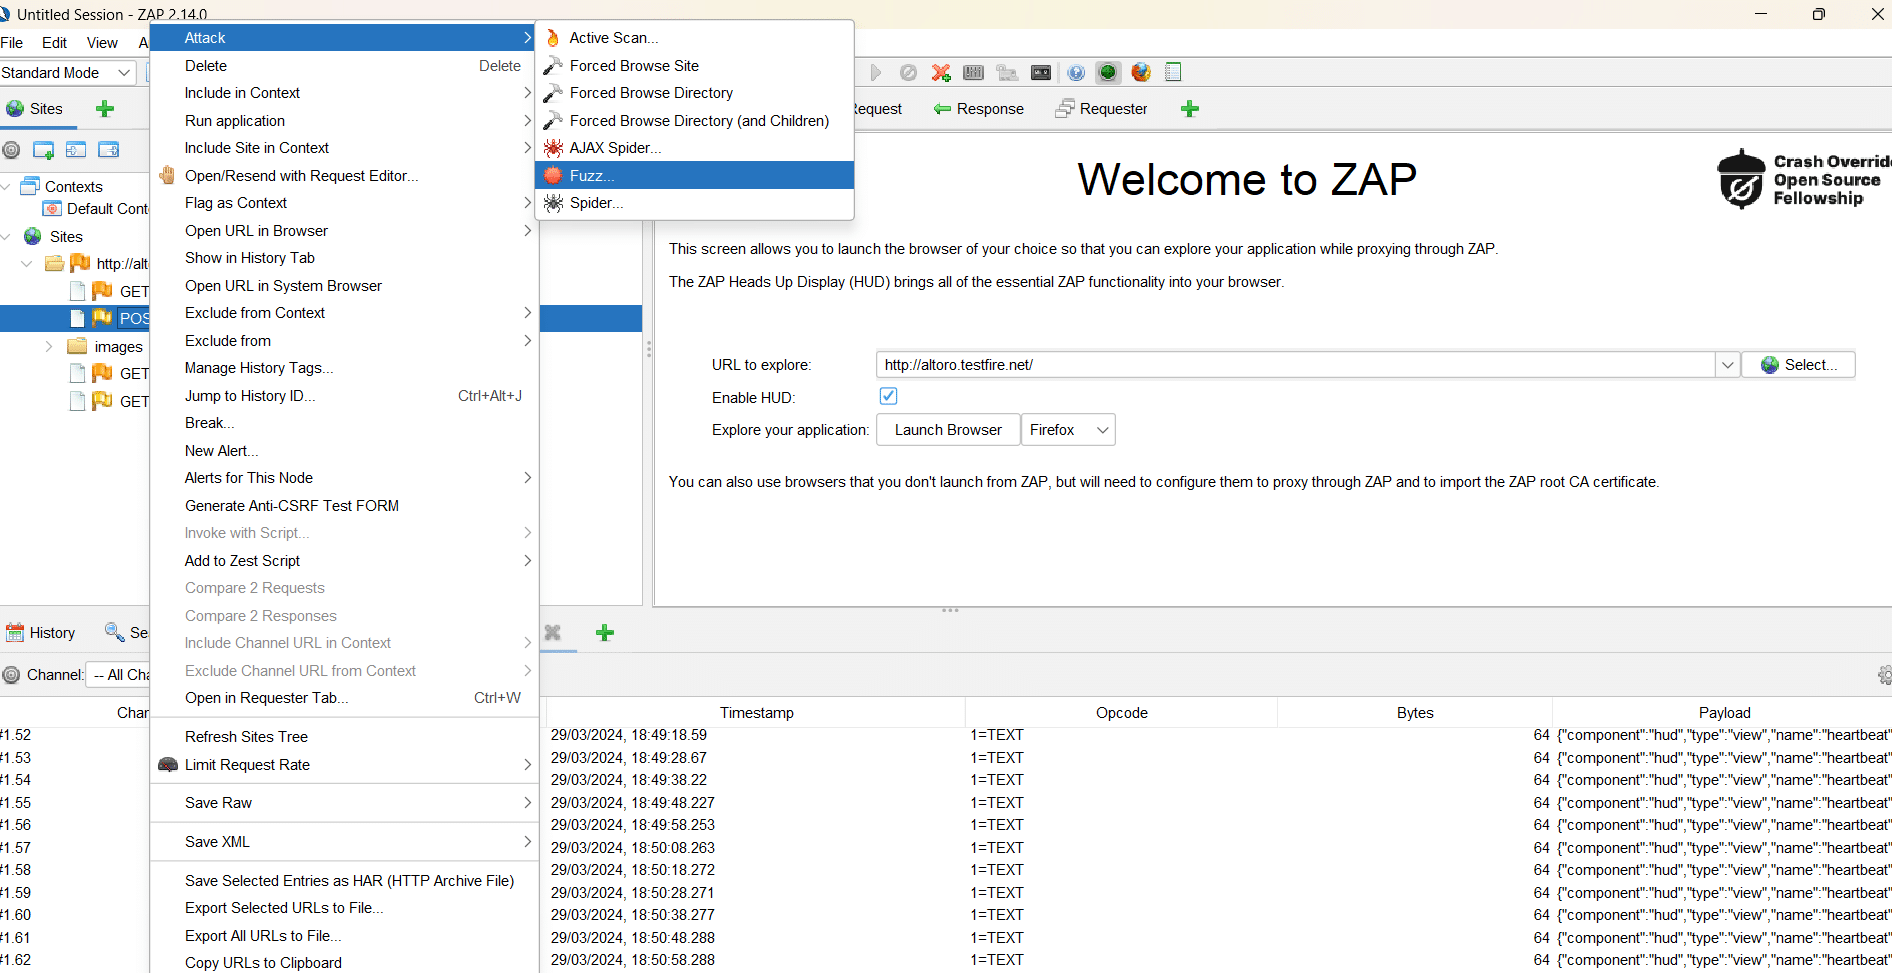
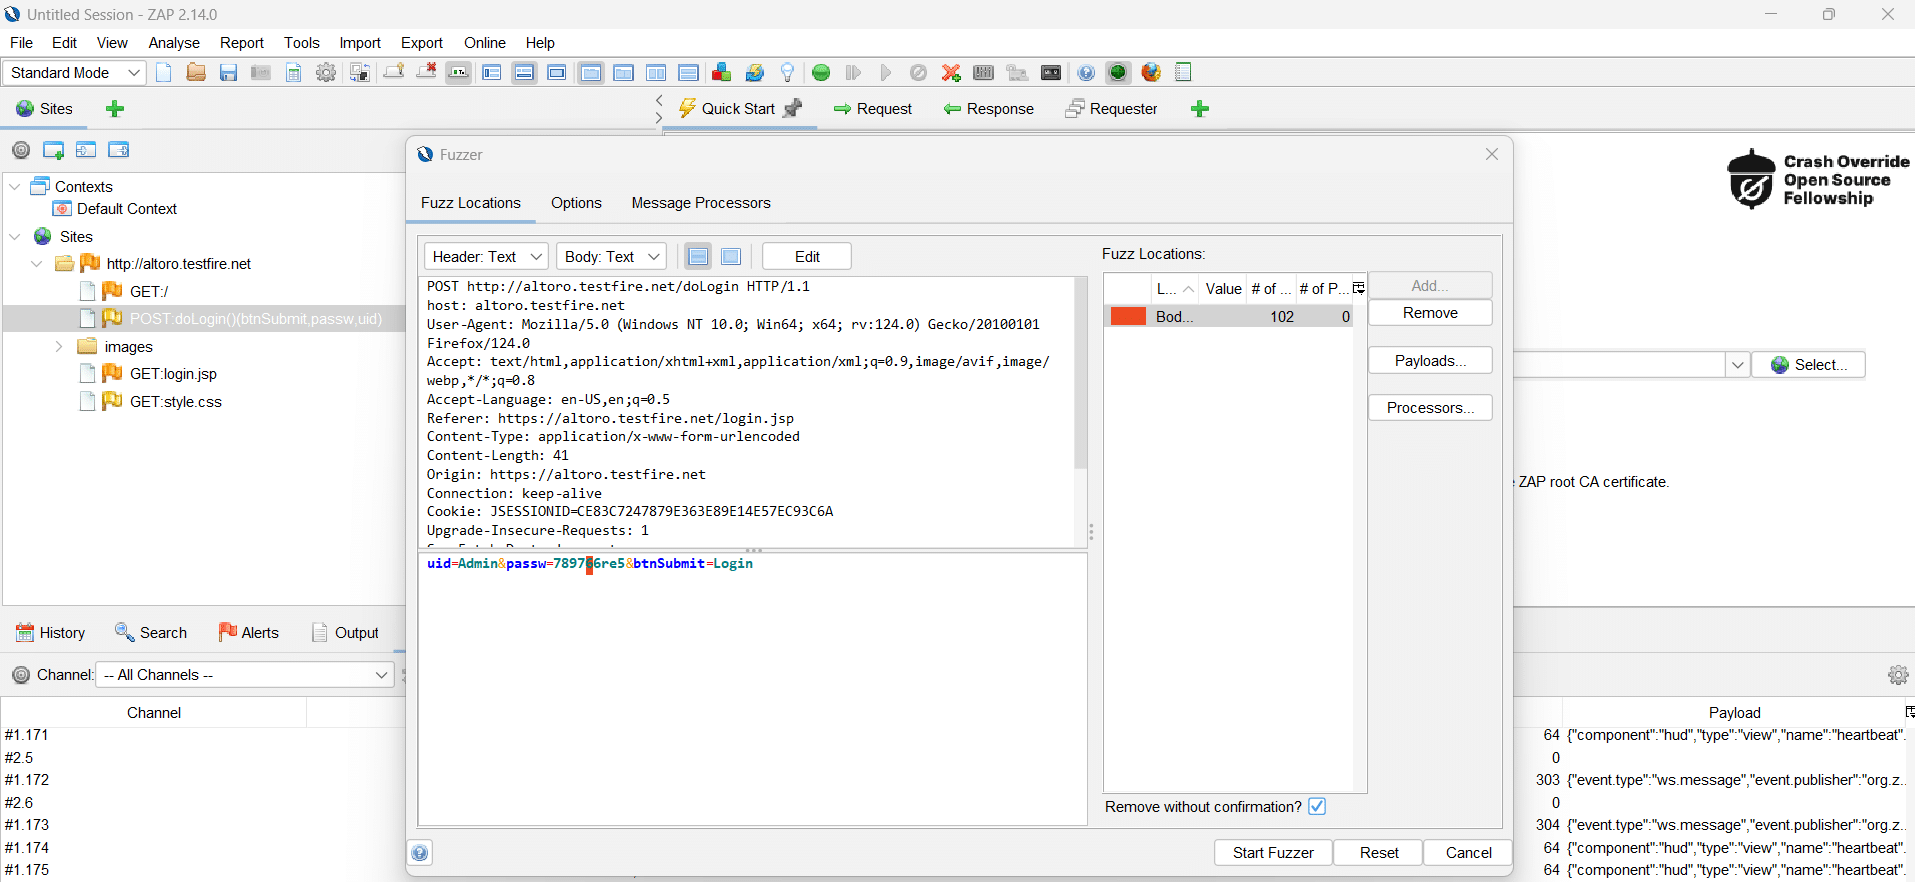
Then Find the POST request and click and Attack> Fuzz menu
Next, add a wordlist and highlight the password we used. This allows us to select the request section that we want to update with new information.
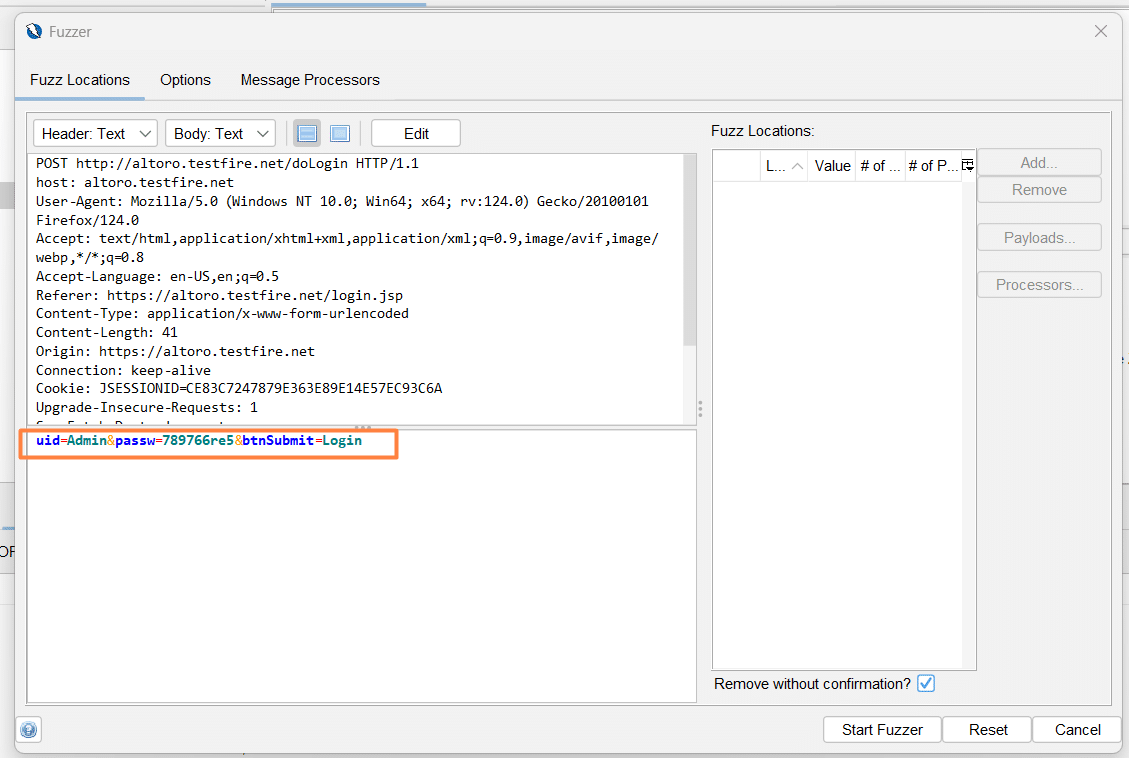
Click on the Payload dialog and click on the “Add …”
Select String (mostly select file ) and paste all passwords as we already created in the file.
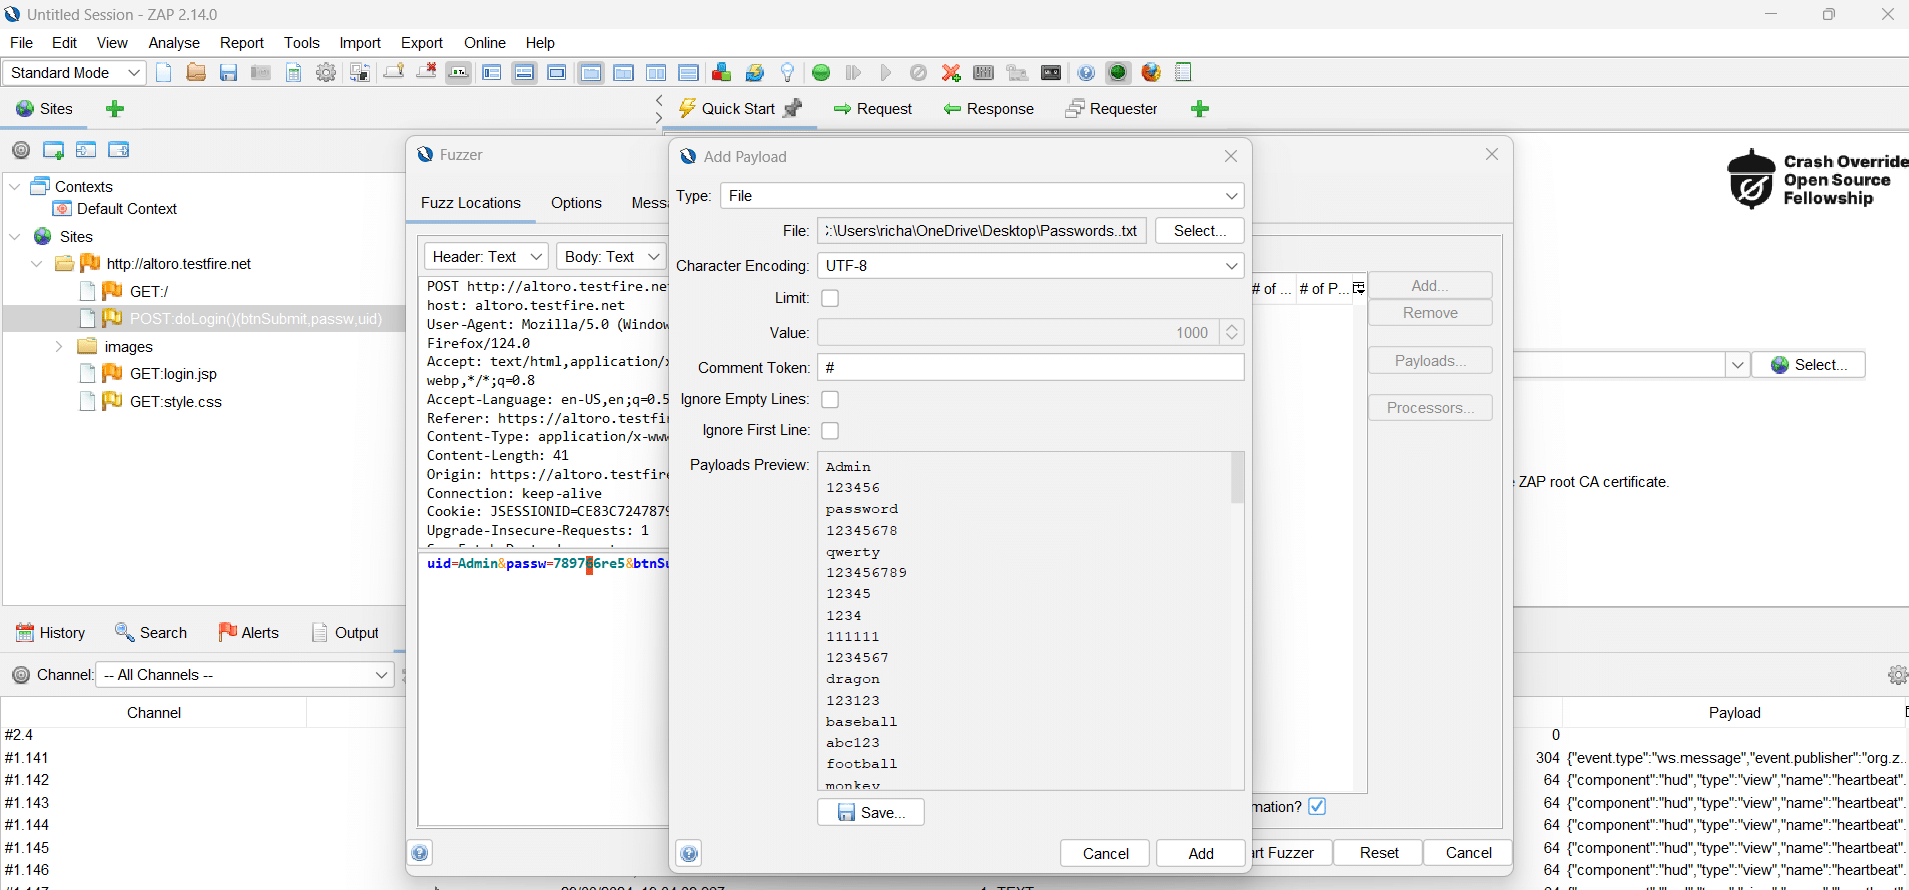
Click on the Add Payload dialog “Add” button.
Click on the Payload dialog “OK” button.
Press the “Start fuzzer” button.
The requests will be shown in the ‘Fuzzer’ Tab at the bottom.
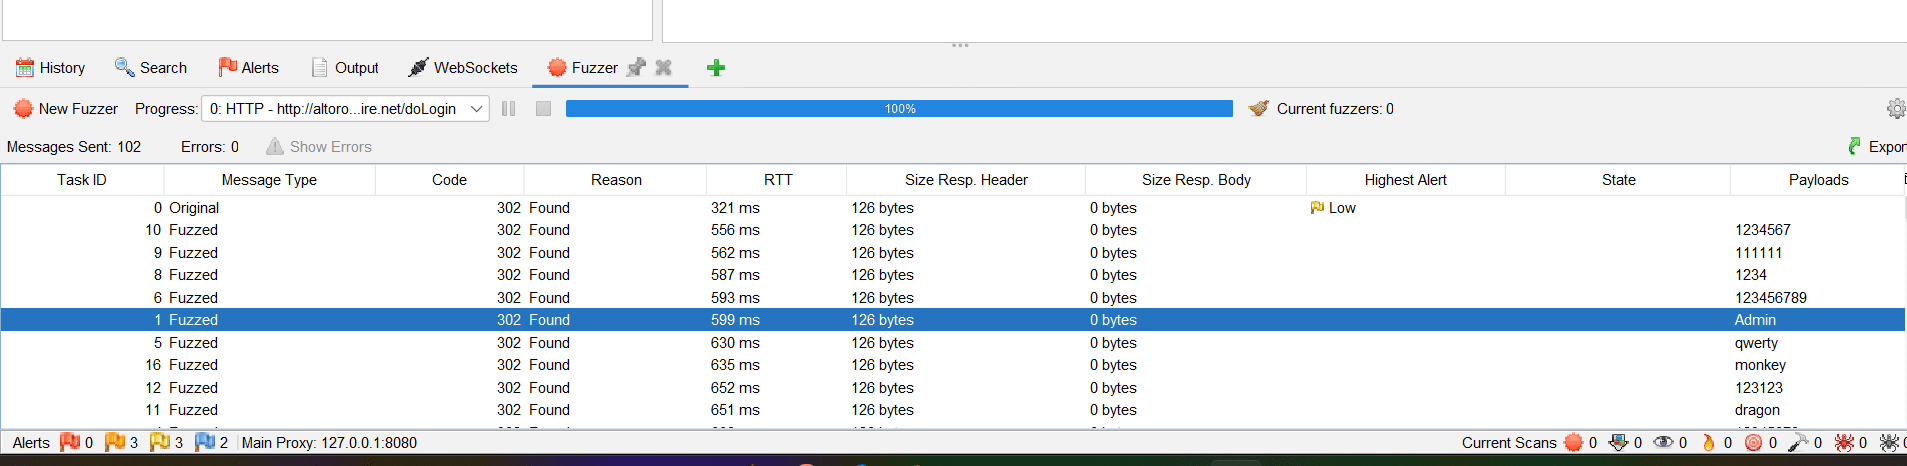
Now we will able to successfully log in to the application with this highlighted password.


