Streaming YouTube Video in Angular Application – Devstringx
Pre-requisites
- Angular must be set up with minimum version 2
Setup an Angular Project
- Use Angular CLI (Command Line Interface) to create a new project, you can use any of the below commands. Go to the directory where you would like to create a project and then run the below command.
- ng new <project name> or
- ng n <project name>
For example :
-
- ng new youtube-video
- Now go into your project directory through the terminal and run the ‘ng serve’ command
- cd youtube-video
- ng serve -o
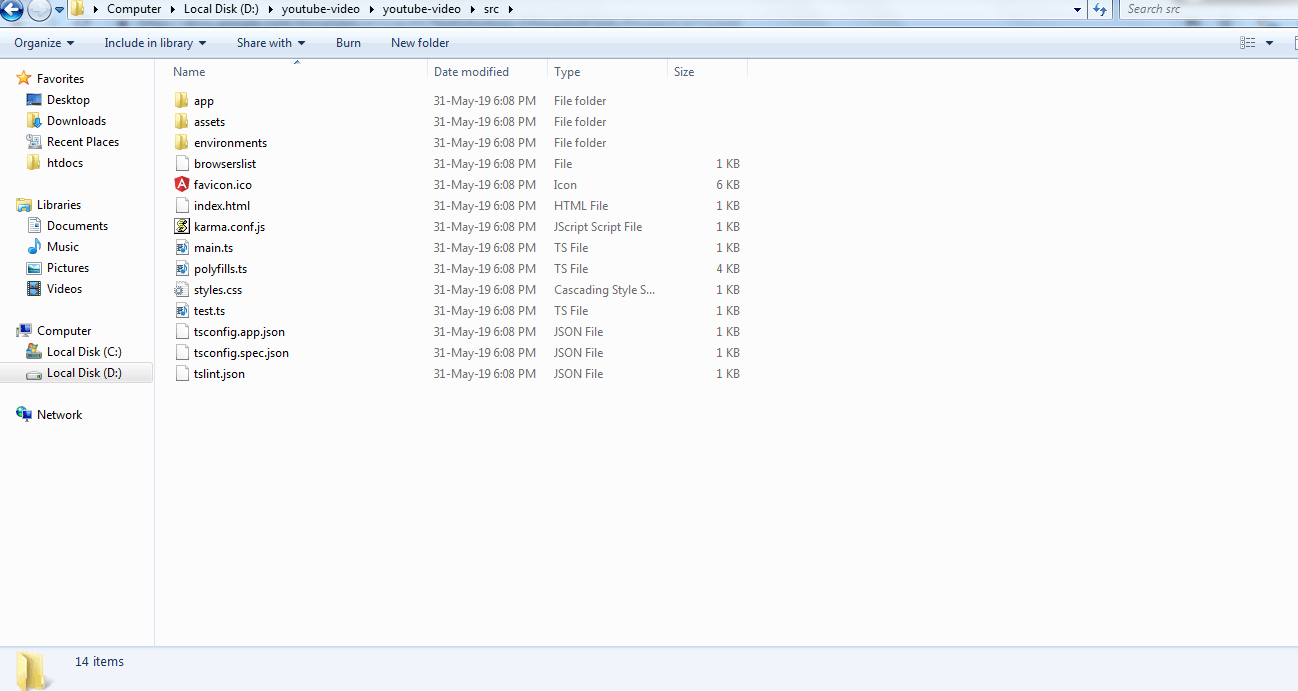
The above command will go to launch the application on http://localhost:4200/ and your project directory will be going to look like

After Setting Up the Angular Project Perform Below Steps:
- In order to play the video we need to create an embedded URL for which first we need to find the id of our YouTube video, for example in below URL id is 2dZT9GShJ3A&t=190s
- Use the code given in the next step to form your embedded URL by concatenating your video id with the URL https://www.youtube.com/embed/ for example
- Copy the below code in your app.component.ts file which is available in your project directory
import { Component } from '@angular/core';

             @Component({

                        selector: 'app-root',

                       templateUrl: './app.component.html',

                       styleUrls: ['./app.component.css']

                 })

                export class AppComponent {

                       public youtubeUrl = 'https://www.youtube.com/watch?v=2dZT9GShJ3A&t=190s';

                       public youtubeId = '2dZT9GShJ3A&t=190s';

                       public embedUrl = 'https://www.youtube.com/embed/'

                       videoUrl: string;

                       constructor() {

                              this.videoUrl =  this.embedUrl + this.youtubeId;

                            }

                    }
- Copy the below code in your app.component.html file which is available in your project directory to create the binding
<iframe width="250" height="150" [src]="videoUrl" allowfullscreen>

             </iframe>
-
- Here we have used the src attribute enclosed by square brackets ex: [src] this represents one-way binding called property binding in angular. Property binding is used to bind values to the DOM properties of the HTML elements.
-
- <allowfullscreen> is used here to enable fullscreen mode in the youtube player.
DOM Sanitizer
- DomSanitizer helps prevent Cross Site Scripting Security bugs (XSS) by sanitizing values to be safe to use in the different DOM contexts
- When a value is inserted into a DOM from a template (via property, attribute, style, class binding, or interpolation), Angular treats all such values as untrusted by default. DOM Sanitizer comes as a rescue for us in such a situation.
Use of DOM Sanitizer
- The correct way to use DomSanitizer is by using a custom pipe and making sure we declare it as a pure pipe so Angular will cache our result and will not run it every time the change detection has fired.
- Follow the below steps to use DOM Sanitizer
- Create PIPE using the below command on Angular CLI (this will generate a file in the directory)
- ng generate pipe <pipe name> or ng g p <pipe name>
- Create PIPE using the below command on Angular CLI (this will generate a file in the directory)
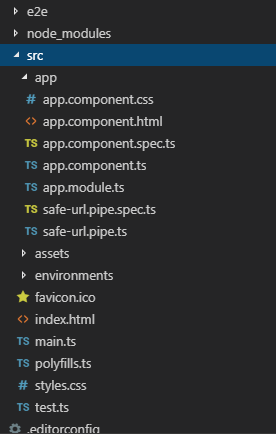
For example, ng generate pipe safe-URL, your project structure will be like below

-
-
- Import DomSanitizer from @angular/platform-browser in your safe-url.pipe.ts
- import { DomSanitizer } from @angular/platform-browser;
- Pass DomSanitizer in the constructor
- constructor(private sanitizer :DomSanitizer)
- In the transform method of pipe use the bypassSecurityTrustResourceUrl method of DomSanitizer
- Import DomSanitizer from @angular/platform-browser in your safe-url.pipe.ts
-
transform(URL) {

                                                 return this.sanitizer.bypassSecurityTrustResourceUrl(URL)

                                           }
-
-
- After following the above steps overall code in your safe-url.pipe.ts file should look like
-
import { Pipe, PipeTransform } from '@angular/core'

                                          import { DomSanitizer } from '@angular/platform-browser'

                                            @Pipe({

                                                   name: 'safeUrl'

                                               })

                                        export class SafeUrlPipe implements PipeTransform {

                                        constructor(private sanitizer: DomSanitizer) {}

                                        transform(url) {

                                              return this.sanitizer.bypassSecurityTrustResourceUrl(url)

                                           }

                                  }
-
- Update your app.component.html file with below code snippet
<iframe width="250" height="150" [src]="videoUrl | safeUrl" frameborder="0" allowfullscreen> </iframe>
I am text block. Click edit button to change this text. Lorem ipsum dolor sit amet, consectetur adipiscing elit. Ut elit tellus, luctus nec ullamcorper mattis, pulvinar dapibus leo.


