
Step to Setup & Install ZABBIX Server
In the below, we share the easy steps that’ll help you to install & set up the ZABBIX server for Monitoring the EC2.
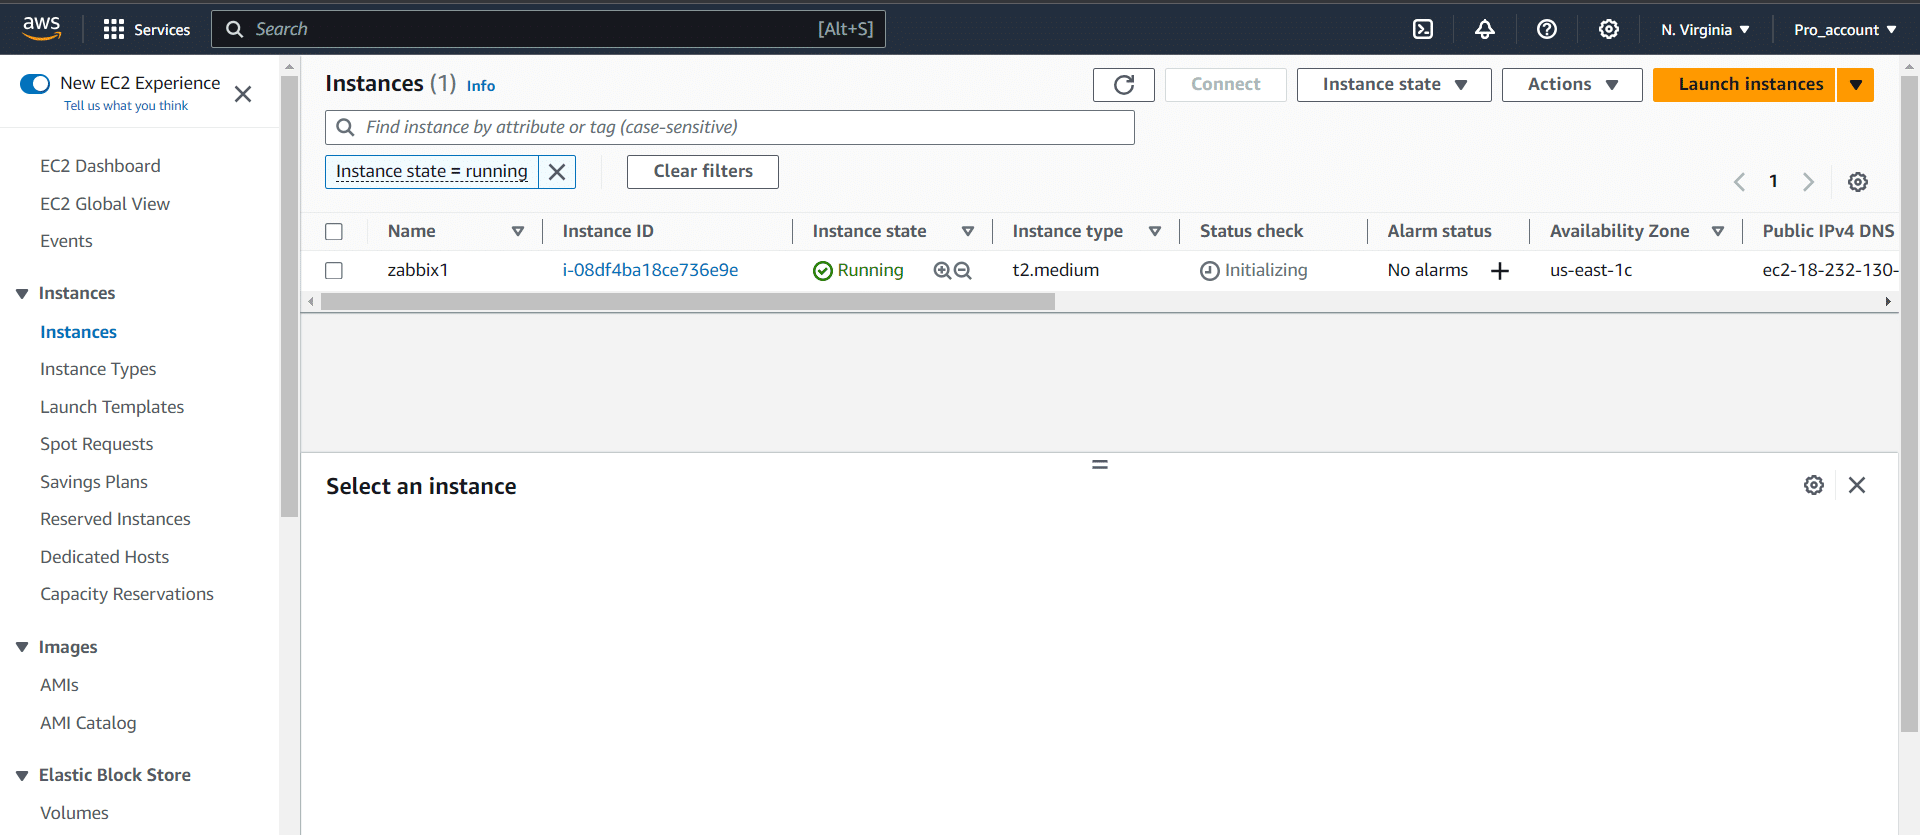
1) Create an Ubuntu 22.04.1 Ec2 instance
2) SSH to your Ubuntu server to run and install the required packages.
3) Run the following commands to install the Zabbix
sudo wget https://repo.zabbix.com/zabbix/6.3/ubuntu/pool/main/z/zabbix-release/zabbix-release_6.3-3%2Bubuntu22.04_all.deb

sudo dpkg -i zabbix-release_6.3-3+ubuntu22.04_all.deb

sudo apt update

sudo apt install zabbix-server-mysql zabbix-frontend-php zabbix-apache-conf zabbix-sql-scripts zabbix-agent
4) Install Mysql server
sudo apt-get install mysql-server

sudo systemctl start mysql
5) Create an initial database
sudo mysql
create database zabbix character set utf8mb4 collate utf8mb4_bin;

create user zabbix@localhost identified by 'your_password_here';

grant all privileges on zabbix.* to zabbix@localhost;

set global log_bin_trust_function_creators = 1;

quit;
6) On the Zabbix server host imports the initial schema and data. You will be prompted to enter your newly created password.
sudo zcat /usr/share/zabbix-sql-scripts/mysql/server.sql.gz | mysql --default-character-set=utf8mb4 -uzabbix -p zabbix
7) Disable the log_bin_trust_function_creators option after importing the database schema.
sudo mysql

set global log_bin_trust_function_creators = 0;

quit;
8) Configure the database for the Zabbix server
sudo vi /etc/zabbix/zabbix_server.conf
Edit file /etc/zabbix/zabbix_server.conf and change the DB password which you saved see point no. 5
9) Start Zabbix server and agent processes
systemctl restart zabbix-server zabbix-agent apache2

systemctl enable zabbix-server zabbix-agent apache2
10) Open the Zabbix UI web page and proceed with web UI. The default URL for Zabbix UI when using the Apache web server is http://your_server_public_ip/zabbix
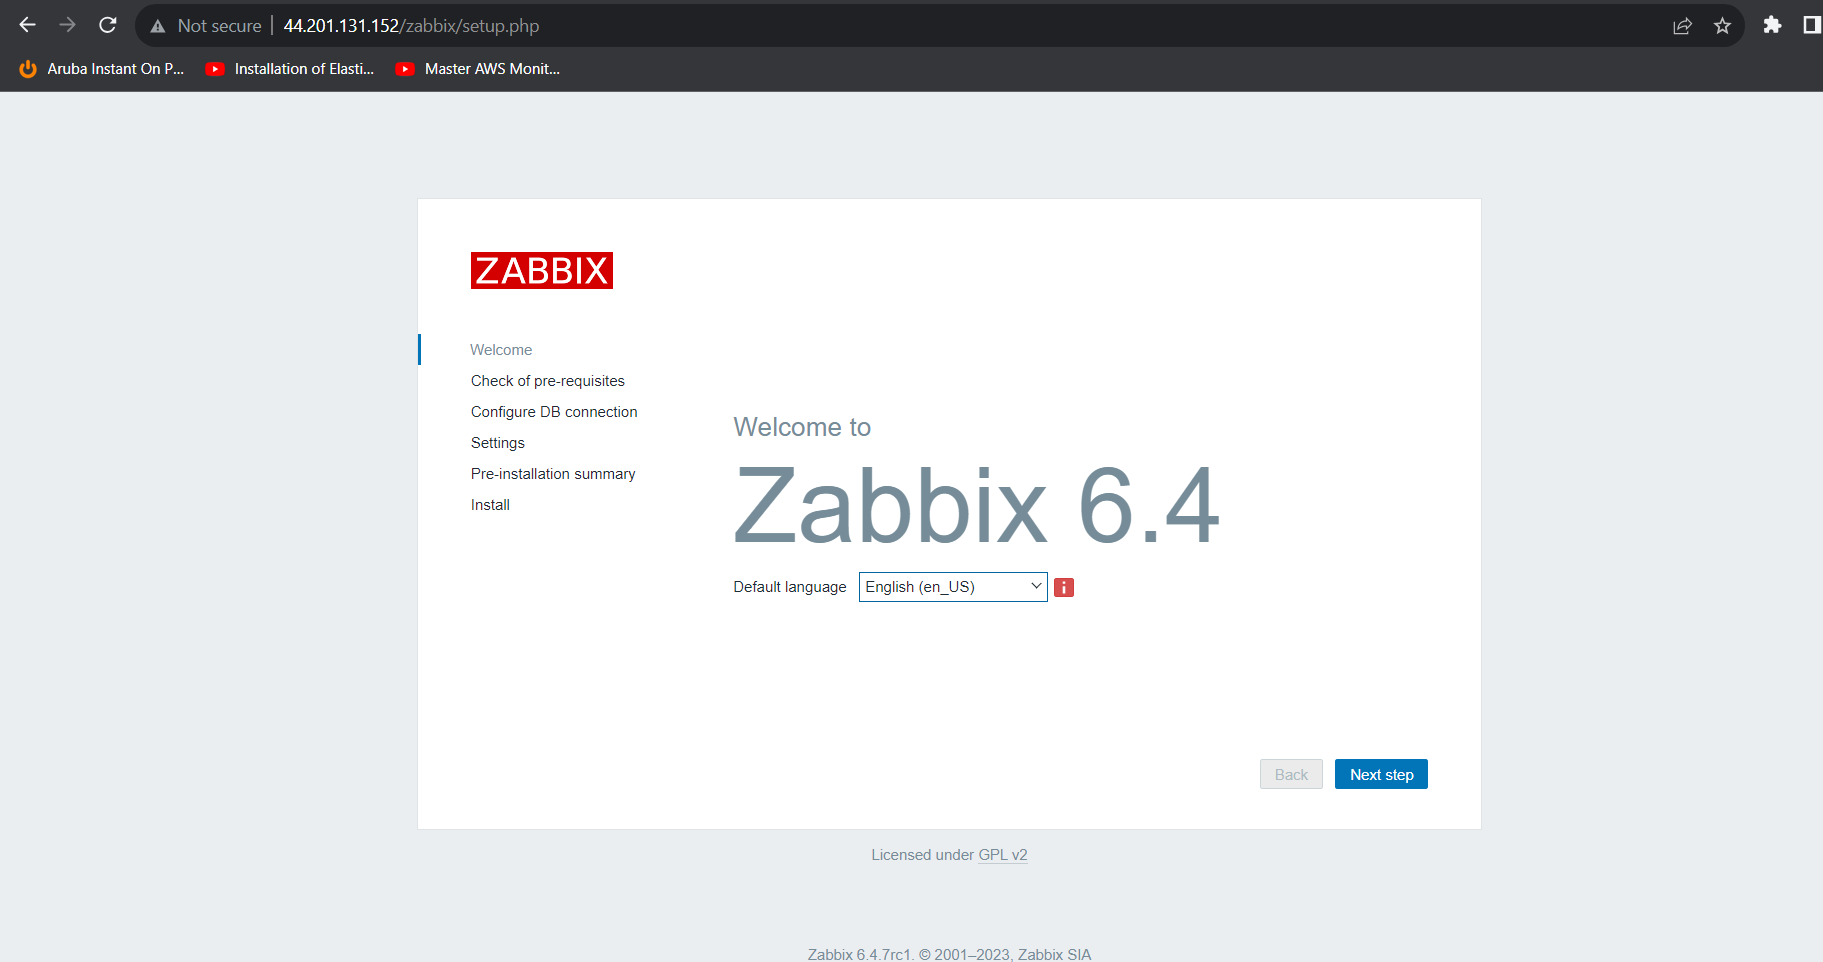
11) After hitting the URL you can see the Zabbix page click on Next Step
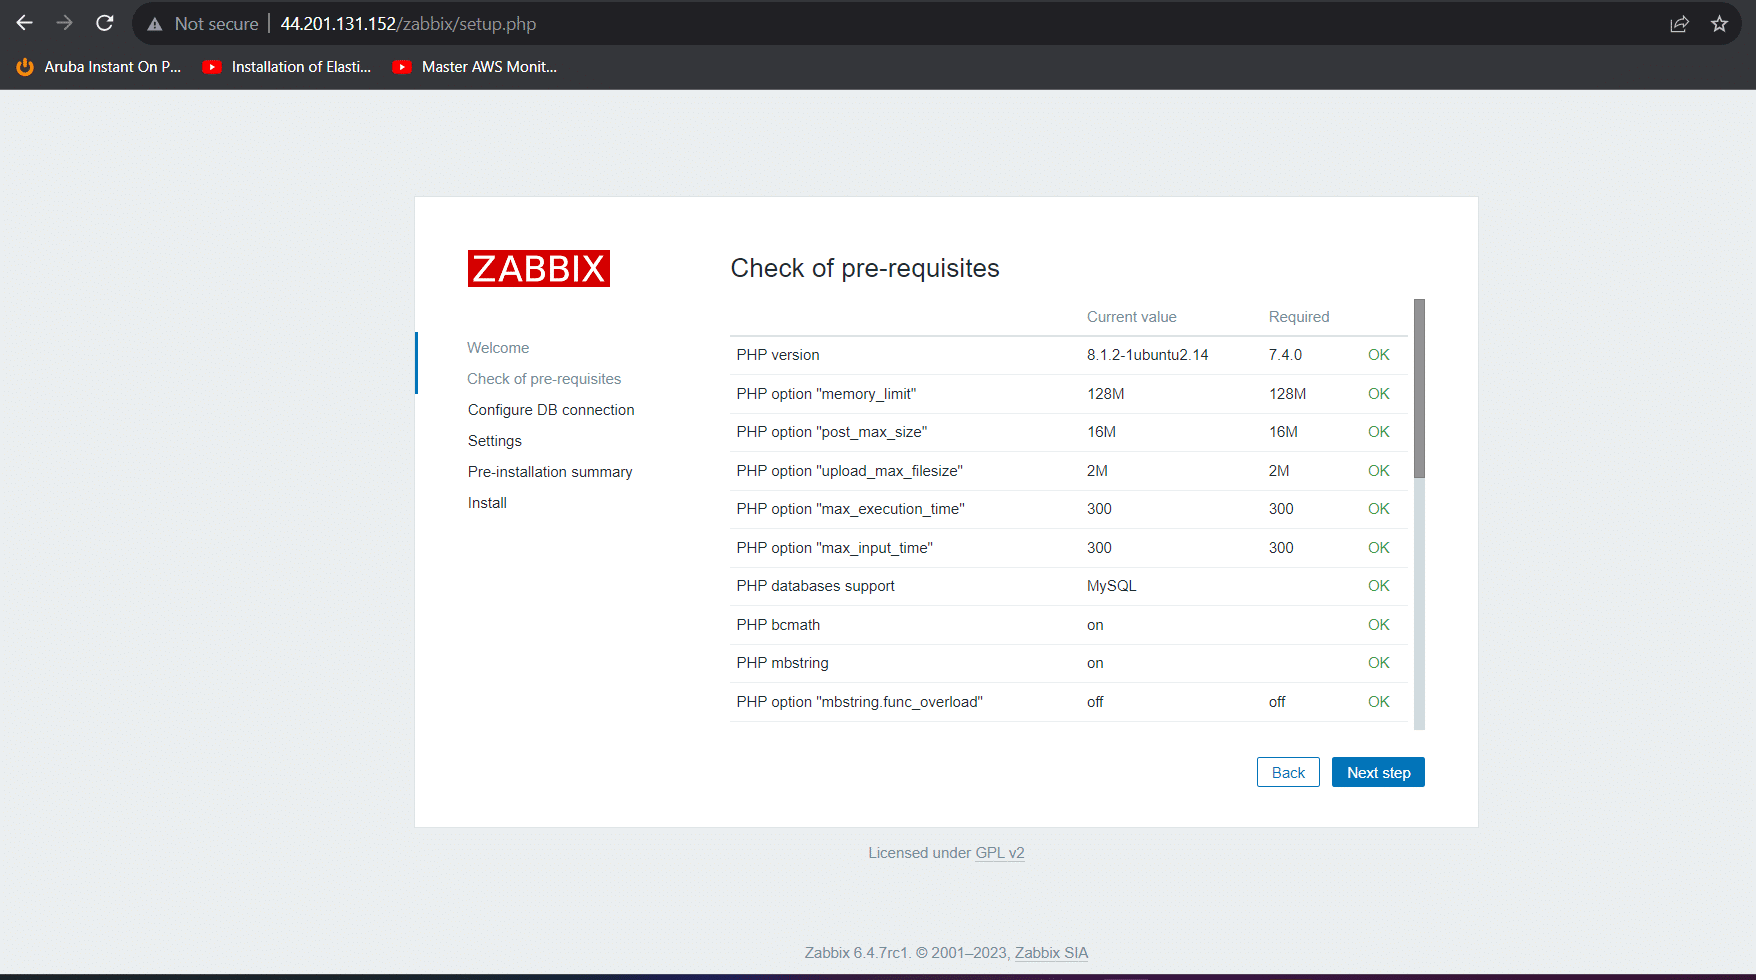
12) Click on Next Step
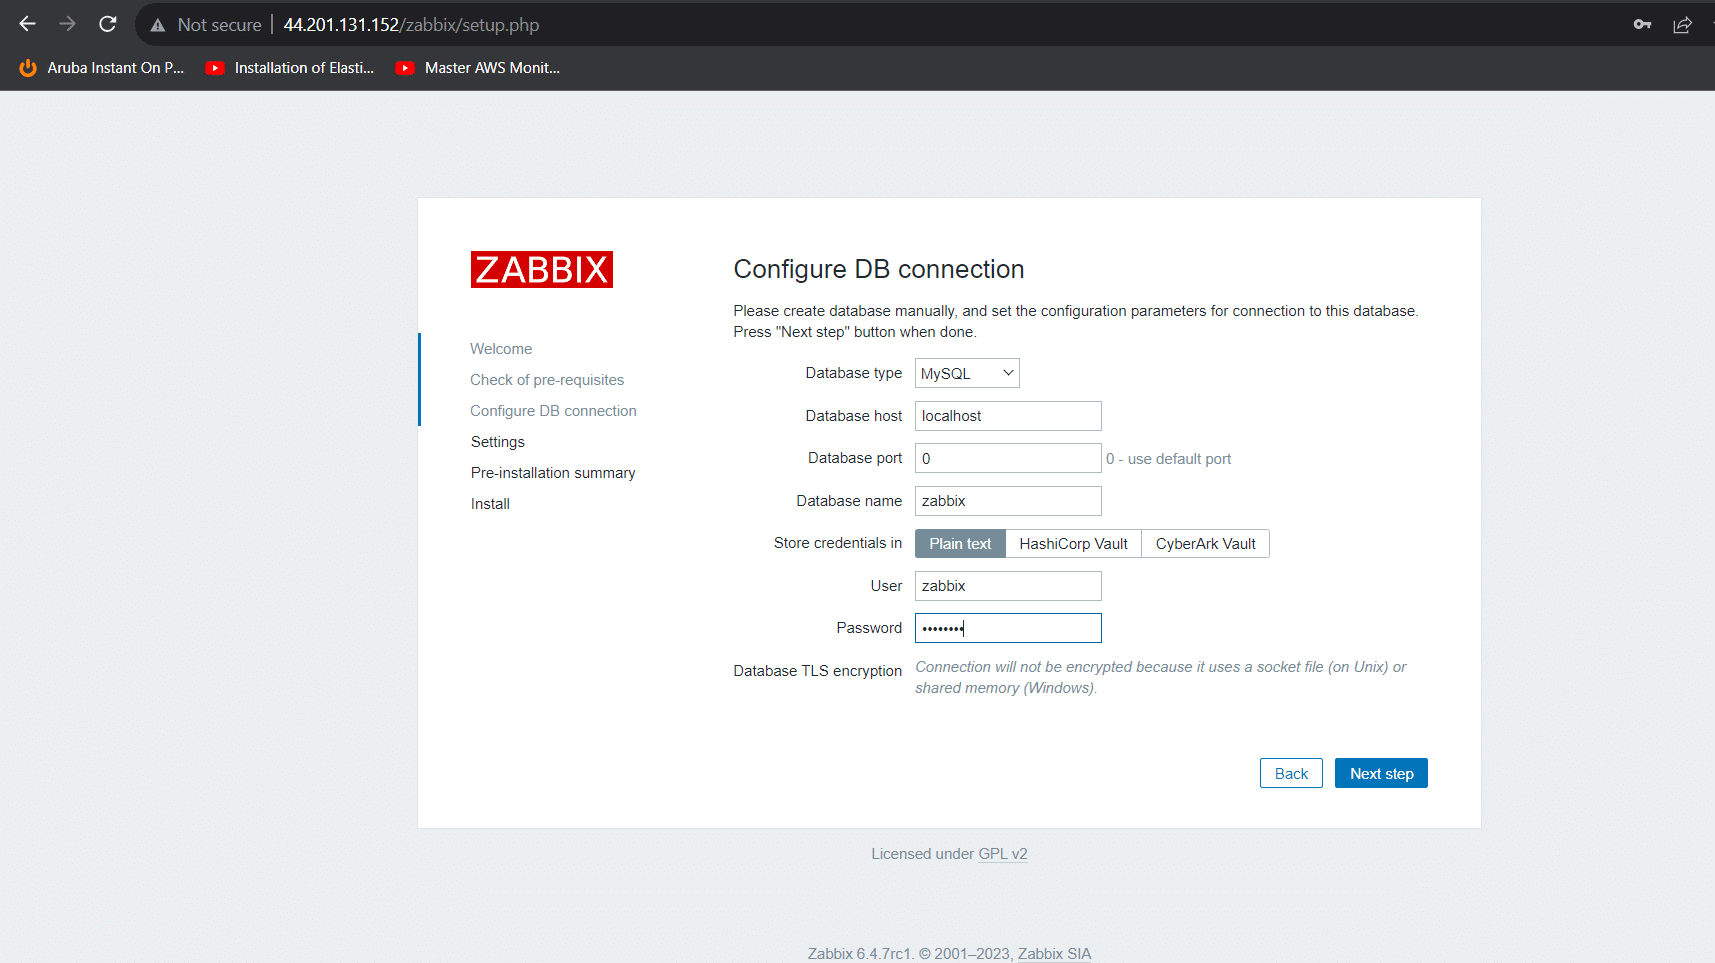
13) Enter the Zabbix db Password then go to the next step which we have set see point 5
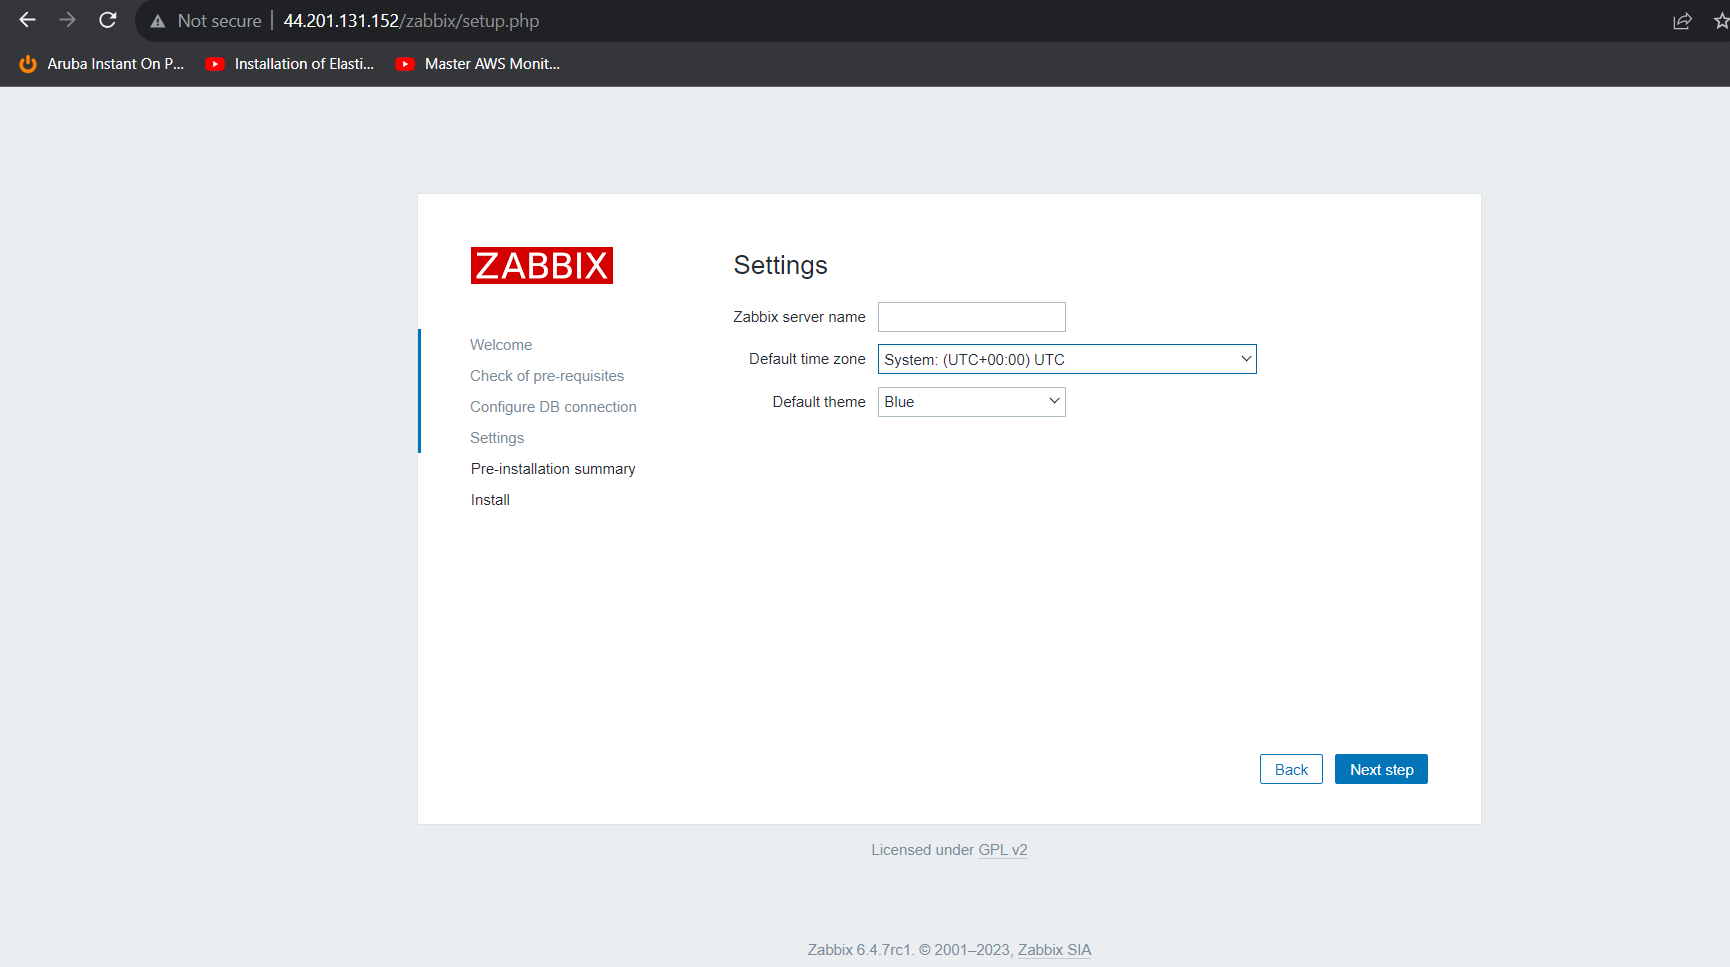
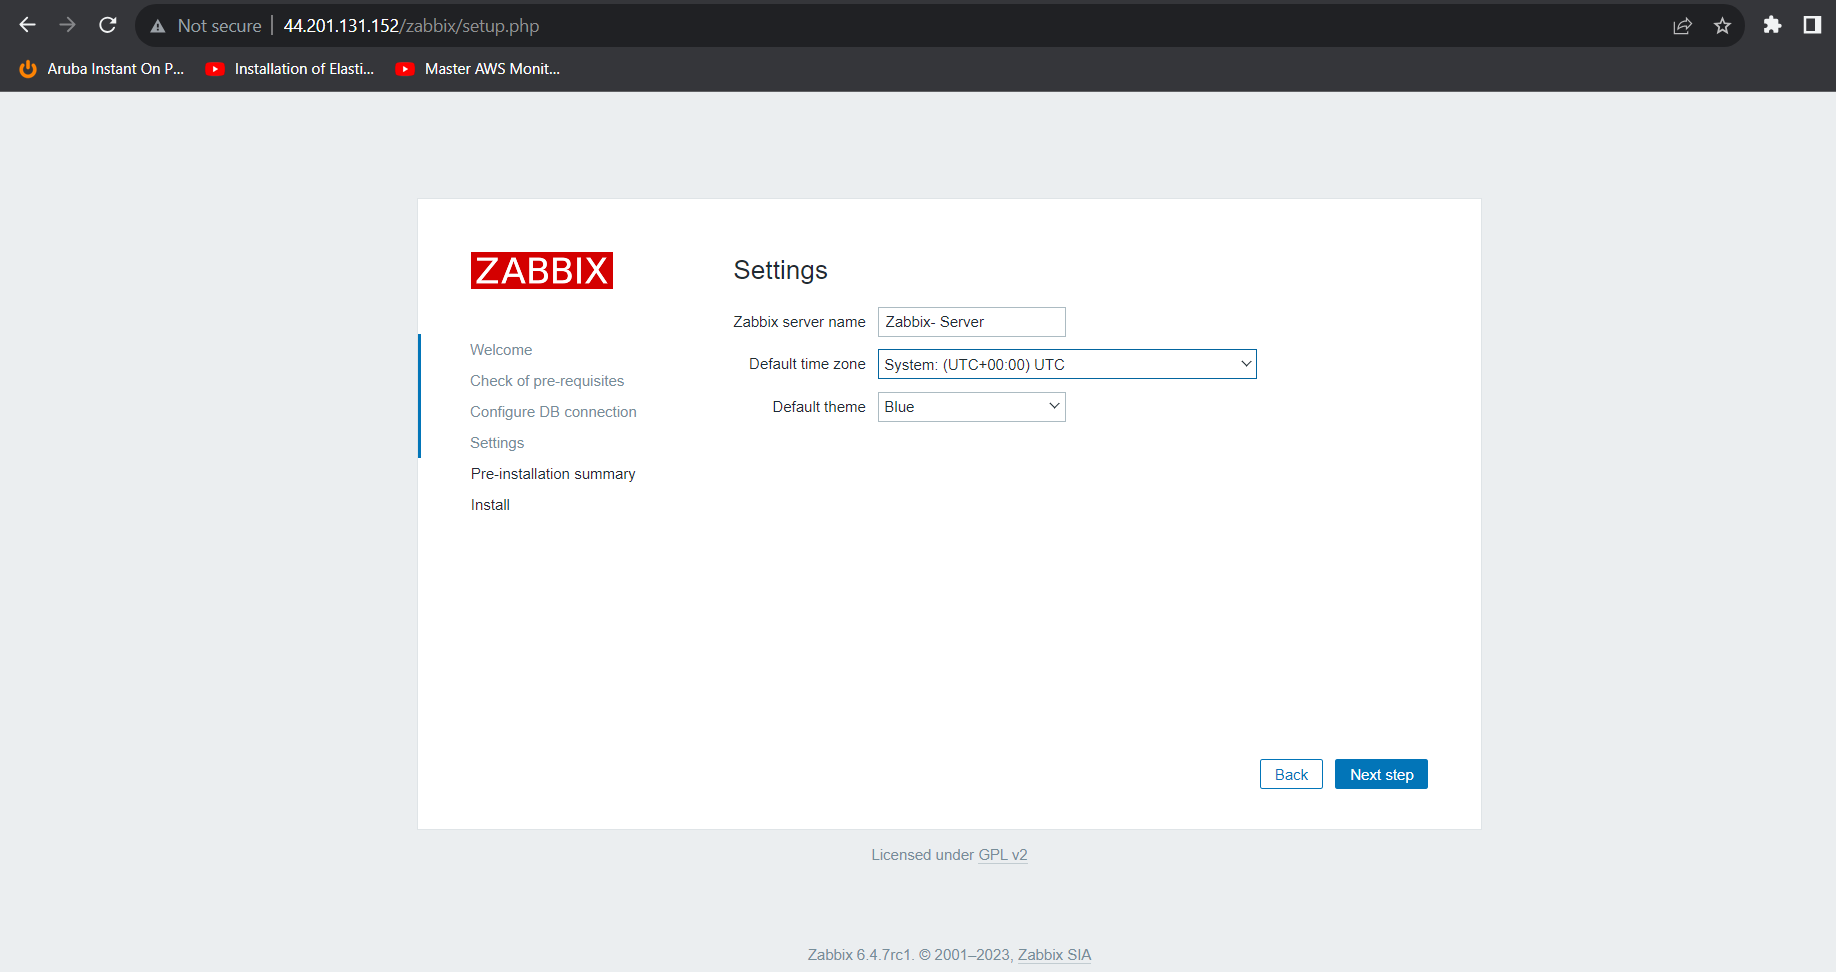
14) Enter the Zabbix Server name then go to the next Step and follow all the steps as given in the screenshot.
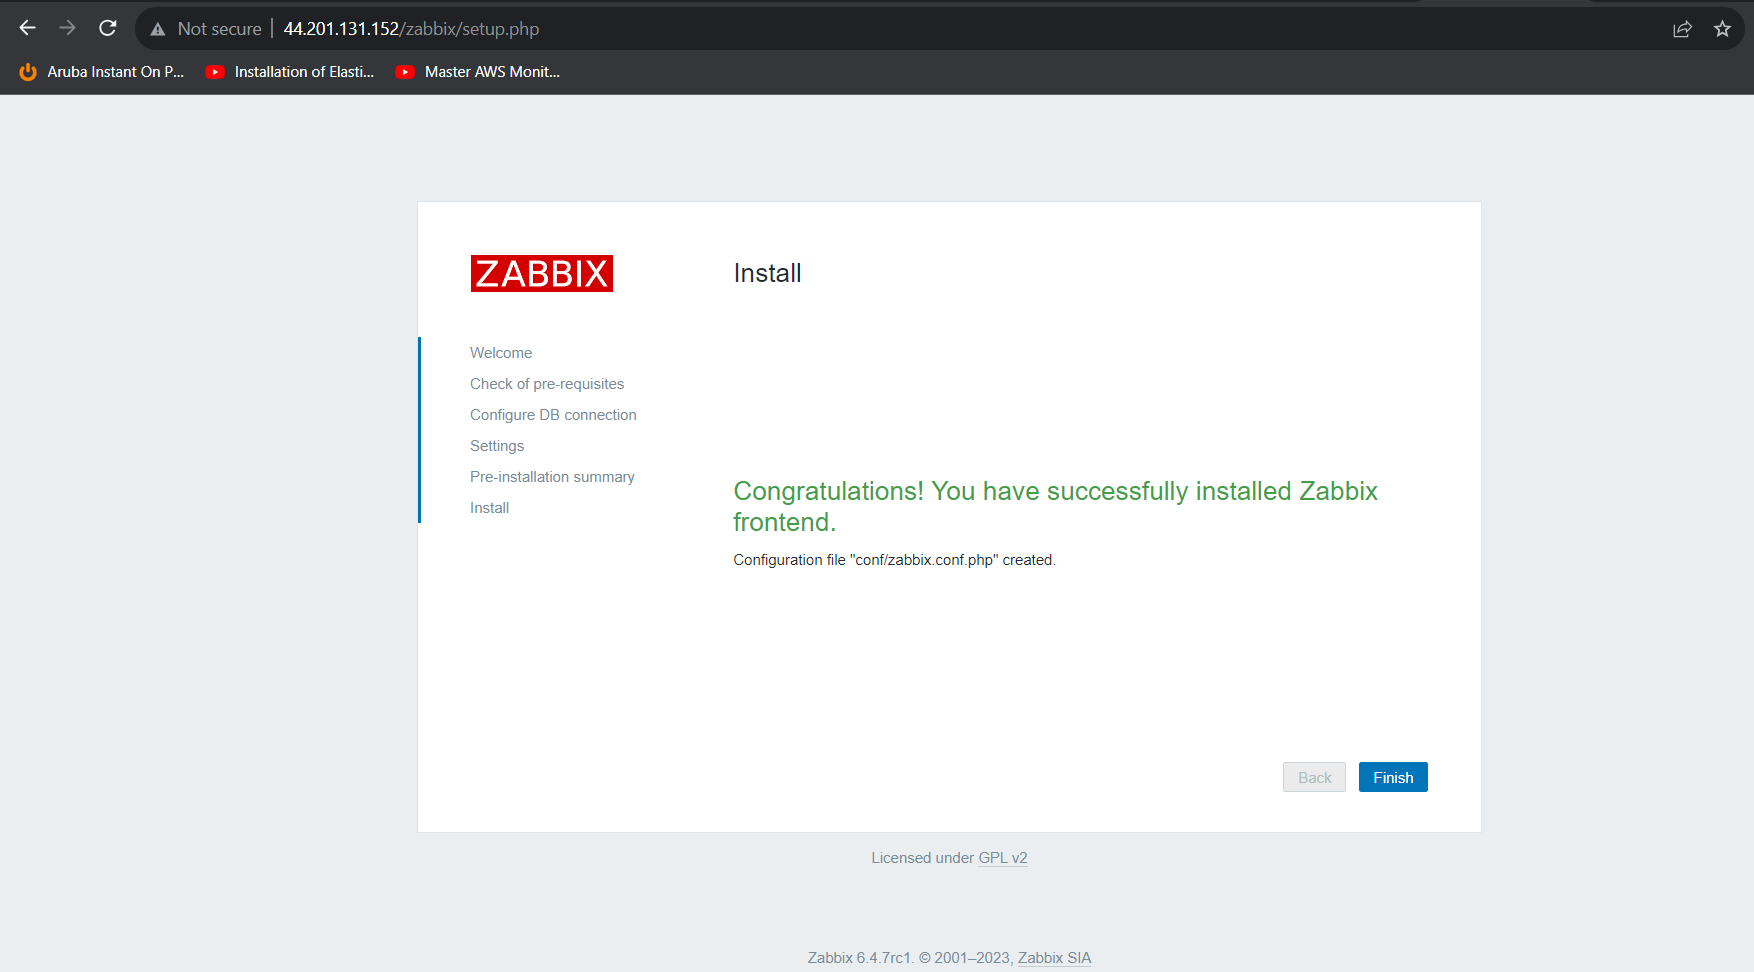
15) Now you can able to access the Zabbix Server.
Conclusion
Zabbix is an excellent choice for organizations seeking a comprehensive and extensible monitoring solution. It provides real-time insights into the performance and health of your IT infrastructure, helps you proactively address issues, and offers the flexibility to adapt to your specific monitoring requirements. To get the most out of Zabbix, invest time in planning, configuration, and customization to align it with your organization’s needs and goals.
Related Post:-


