
What Is EC2?
Amazon Elastic Compute Cloud is a service offered by Amazon Web Services (AWS) that allows us to rent machines referred to as “instances,” where we can run our applications. These EC2 instances are part of Amazon’s computing platform. This is designed to provide scalable and flexible computing power in the cloud.
Some Key Features of EC2 Instances Include
Amazon EC2 instances are widely used for purposes like hosting websites and web applications performing batch processing tasks, conducting data analysis operations, and supporting machine learning workloads. They serve as a component for cloud-based applications and services hosted on AWS.
1) Variety of Instance Types
Specifically, EC2 provides several optimized instance types for different purposes comprising compute-optimized, memory-optimized, storage-optimized, and GPU instances. Choose an instance type that fits the needs of our application.
2) Scalability
We may easily scale up or down your EC2 instances depending on your application’s requirements. Launch multiple instances and create auto-scaling groups to handle traffic spikes/scale-in for lower demand.
3) Customization
We choose the OS, instance size, storage types, and network configuration for each project. That is, you can customize some examples.
4) Pay-as-You-Go-Pricing
Following the pay-as-you-go tradition of Amazon Web Services (AWS), EC2 charges you only for the resources consumed by computing capacity. With EC2, you have on-demand and pay–as–you go options; no long-term contracts required.
5) Security
EC2 offers security features, such as Virtual Cloud (VPC) for network isolation security groups for firewall configurations and the option to utilize AWS Identity and Access Management (IAM) for precise access control.
6) Availability
AWS provides availability zones within regions enabling us to deploy EC2 instances across data centers for enhanced availability and resilience.
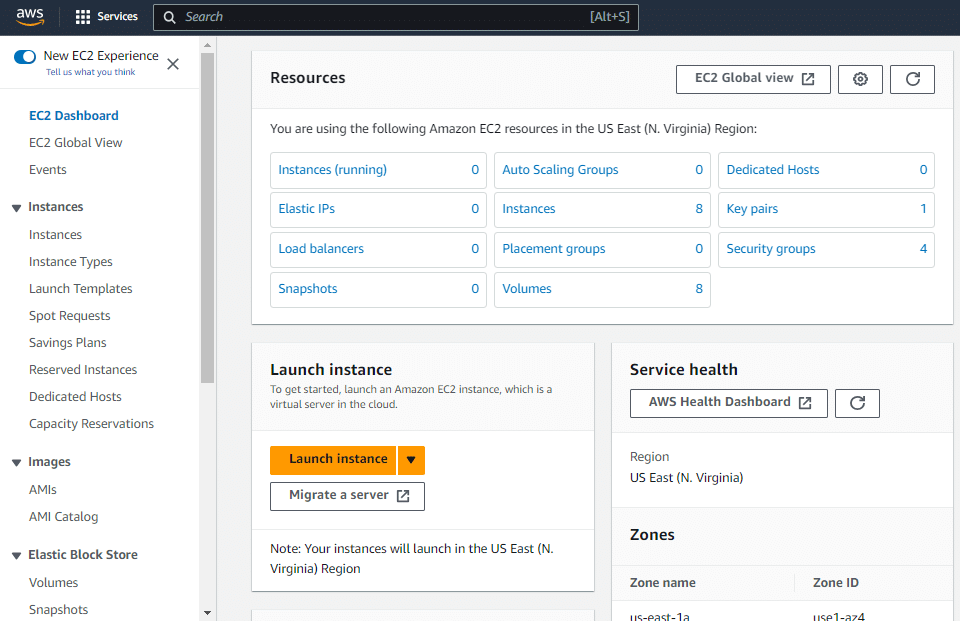
Steps to Launch EC2 Instances
This includes a certain steps to perform inside of the AWS Dashboard:
1) Sign in to the AWS Management Console
- Go to the AWS Console after logging in.
- Select the “Sign In to the Console” tab; use the AWS login information.

2) Search IAM in Global Search
Go to the IAM Service under the Compute Section or Search Directly for IAM in Global search:
- Upon logging in, navigate to Services at the top-left corner.
- To reach the EC2 dashboard under the “Compute” section, select “EC2”.
3) Launching Instance
- To begin the instance creation process, click on the “Launch Instance” Button.
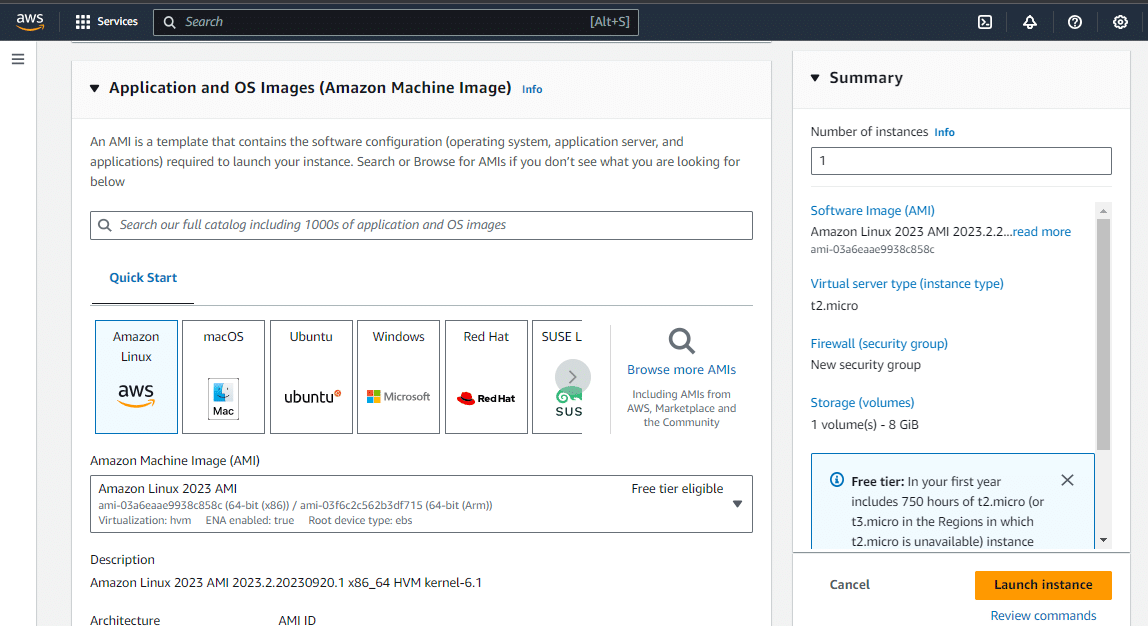
4) Choosing an Amazon Machine Image (AMI)
- Under the “Select an Amazon Machine Image (AMI)” section, we would pick an AMI suiting the OS and software combination of our choice for the instance.
- We will be provided with EC2 instances on which we can run an operating system of choice from AWS-provided AMIs, community AMIs, and customized AMIs.
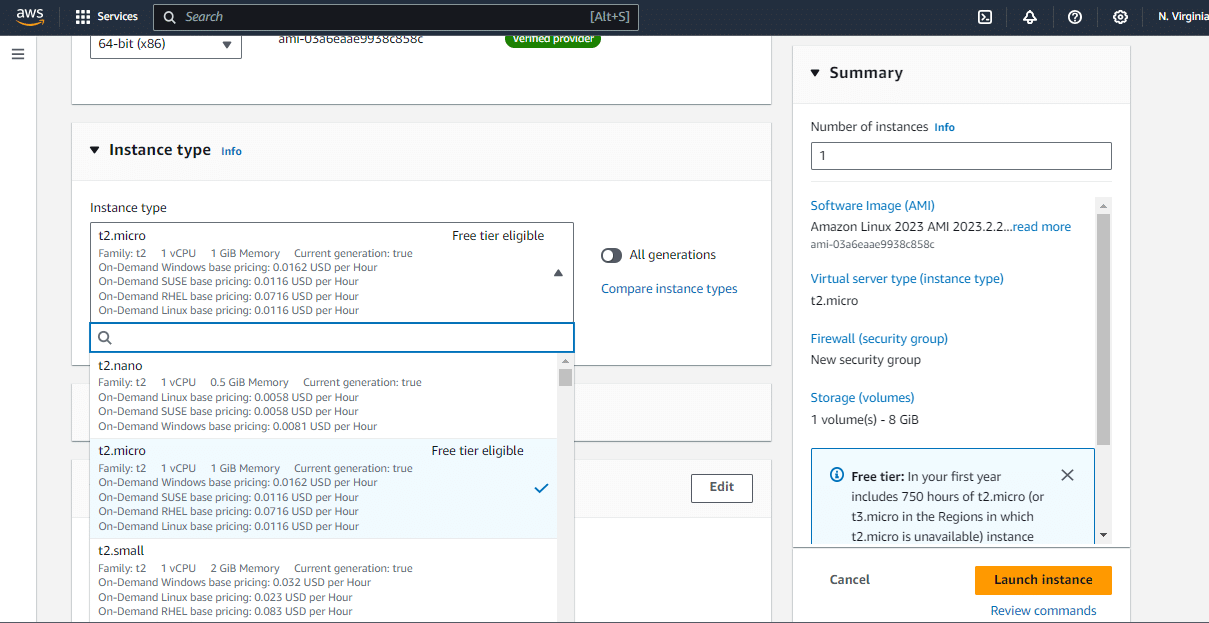
5) Choose an Instance Type
- Choose the right type of EC2 instance under the “Choose an Instance Type” Section. There is a difference in hardware in terms of CPU, memory, etc between different instance types.
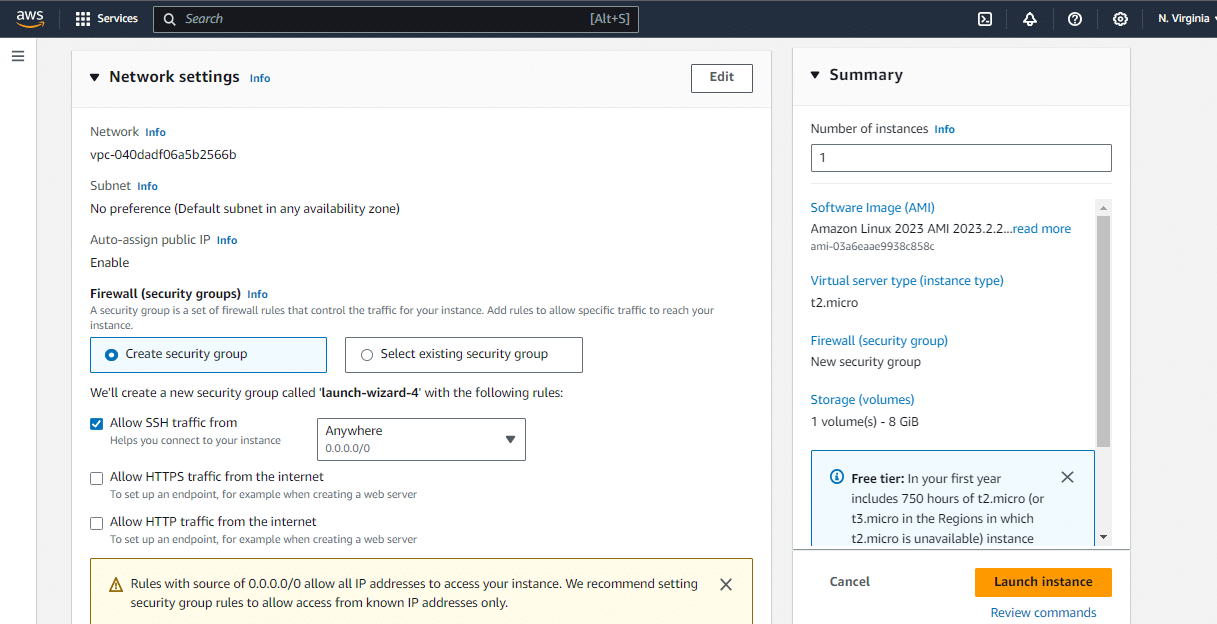
6) Configure Instance Details
- We can configure Instance Details in the Configuration Instance Details section where we can set the instance count, network settings, and other things.
- If necessary, we can configure the auto-scaling feature as well as placement groups for instance.
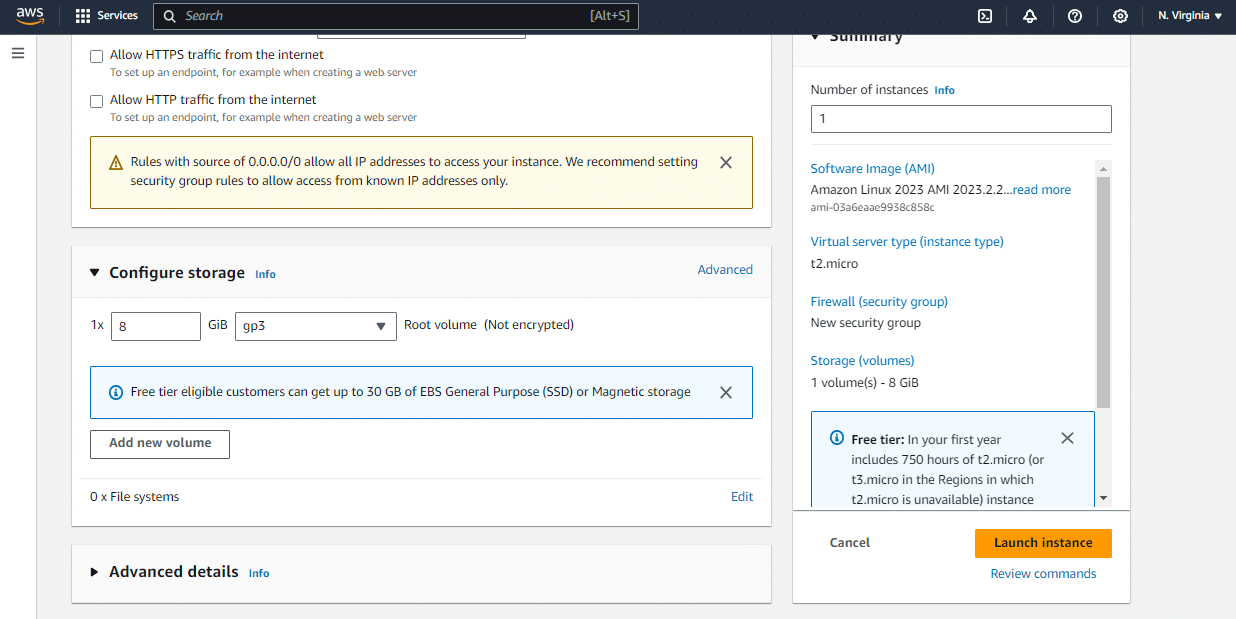
7) Add Storage
- To add storage to our instance, we may decide on its volume in gigabytes, which will depend on its type.
- To add more volumes, we can use EBS (Elastic Block Store).
8) Add Tags (Optional)
- Use the “Add Tags” item to tag our instance for convenience in organizing and managing it. This is optional, but it may be useful in keeping track of the costs.
9) Configure Security Group
- In the “Configure Security Group” section, we may specify the inbound and outbound network traffic rules. Security groups are just like Firewalls to regulate traffic.
10) Review and Launch
- In the “Review Instance Launch” section, check that the configuration of our instance is proper.
- When ready, click on “Launch”.
11) Create or Select a Key Pair
- Our instance can be accessed securely with the help of a key pair. Alternatively, we may generate a new key pair or use an existing one.
- When generating a new key pair from AWS; they would ask us to get the private keys in the .pem file. Keep this file encrypted. It’s needed to SSH into our instance if we have a Linux-based instance or to decrypt the Windows Administrator Password in case of a Windows instance.

12) Launch Instances
- Once we have chosen a key pair, click the “Launch Instances” button to proceed in creating an instance.
13) View Instances
- Upon execution, this will take us to an EC2 dashboard where we shall observe the progress of our instances being launched. After starting up the instance it will have a public IP or be available on demand when we need to access it.

Related Post:-


