
Jira Automation Rest Apis
We can use REST APIs to build apps for Jira, script interactions with Jira, or develop integrations between Jira and other applications.
Steps of Jira Server Installation
- First, You have to download Jira Server on your localhost.
- After Installation, You have to start the Jira server. By default, Jira will automatically start on Port 8080.
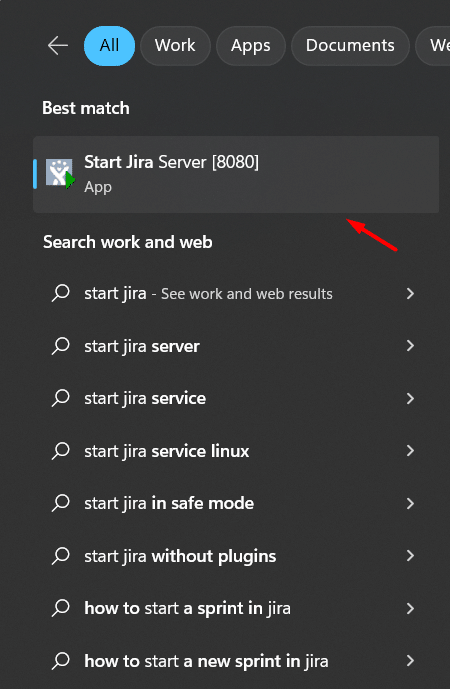
- After a few seconds, enter this URL http://localhost:8080/ on the browser.
- Log in with your credentials on Jira.
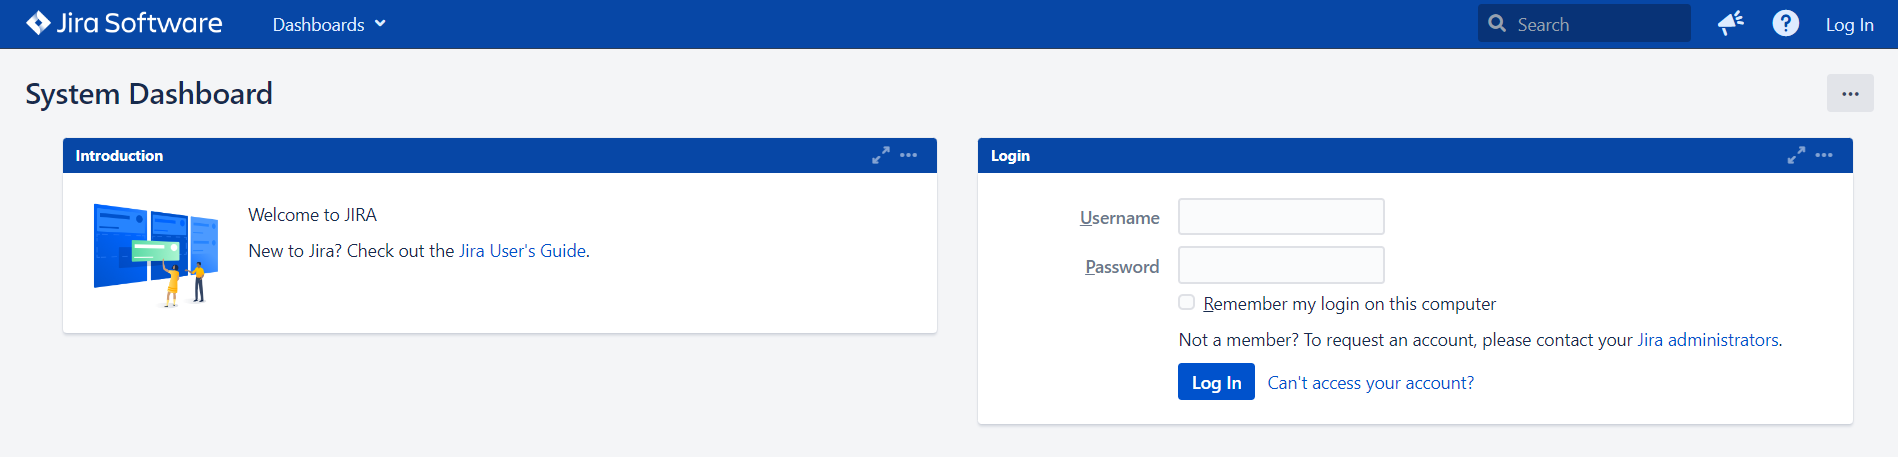
- Now, You are good to go with Jira.
Automation Setup for Jira API’s
- First, you have the Java Development Kit (JDK) installed on your system.
- For IDE, Here I am using Eclipse IDE. You can use others also.
- We have to add a RestAssured dependency in the pom.xml file.
- For Jira Authentication, Jira supports various authentication like Basic Authentication, cookies-based authentication, and OAuth but here, we are using cookies-based authentication with Jira username and password and after login, we have to handle the session key.
Jira Ticket Creation
1) Jira Ticket Payload
String payload =
"{\r\n"
            + " \"fields\":{\r\n"
            + " \"project\":{\r\n"
            + " \"key\":\"project key\"\r\n"
            + " },\r\n"
            + " \"summary\":\"summary for ticket\",\r\n"
            + " \"description\":\"Description of ticket\",\r\n"
            + " \"issuetype\":{\r\n"
            + " \"name\":\"Bug\"\r\n"
            + " }\r\n"
            + " }\r\n"
            + "}"
- You have to add your project key :
- While creating a new project, you have to set the Project key as well
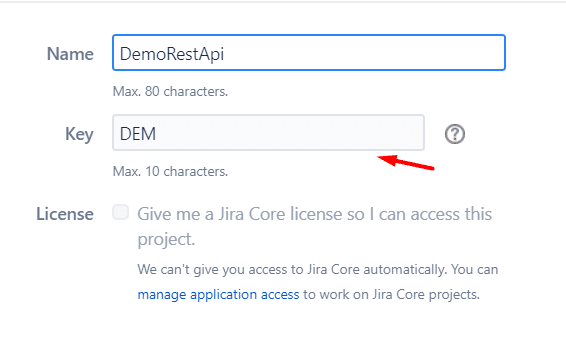
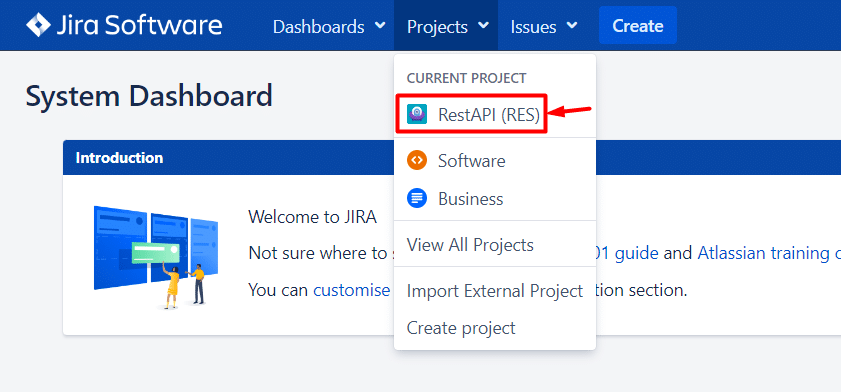
- Go to Jira Dashboard and you will find the project key as shown in the image below
- Add Summary, Description, and Issue Type of your ticket.
- Issue Type can be Bug, Improvement, Tasks, Epic, etc.
2) Create a Jira Ticket, Add Comments, and Add Attachments
import io.restassured.RestAssured;
import static io.restassured.RestAssured.*;
import java.io.File;
import io.restassured.filter.session.SessionFilter;
import io.restassured.path.json.JsonPath;
public class JiraTest {
public static void main(String[] args) {
//Jira Base URI
RestAssured.baseURI= "http://localhost:8080";
SessionFilter session = new SessionFilter();
String expectedMessage = “Hey, how are you? This is my first comment”;
//Login Into Jira
String loginPayload = “"{ \"username\": \"UserName\", \"password\": \"Password\" }"”;
//Extract the Response
String response =given().header("content-type", "application/json").body(loginPayload).filter(session).when().post("/rest/auth/1/session").then().extract().response().asString();
// creating a bug ticket
String ticketpayload = “"{\r\n" + " \"fields\":{\r\n" + " \"project\":{\r\n" + " \"key\":\"RES\"\r\n" + " },\r\n" + " \"summary\":\"DebitCard Defect\",\r\n" + " \"description\":\"Creating my first bug\",\r\n" + " \"issuetype\":{\r\n" + " \"name\":\"Bug\"\r\n" + " }\r\n" + " }\r\n" + "}"”;
//Extract the Response
String ticketResponse = given().header("content-type", "application/json").body(ticketpayload).log().all().filter(session).when().post("/rest/api/2/issue").then().assertThat().statusCode(201).extract().response().asString();
//Add a comment in jira ticket
String cmntPayload = “"{\r\n" + " \"body\": \""+expectedMessage+"\",\r\n" + " \"visibility\": {\r\n" + " \"type\": \"role\",\r\n" + " \"value\": \"Administrators\"\r\n" + " }\r\n" + "}"”;
//Extract the Response
String addCommentResponse = given().pathParam("key", "ticketID").header("content-type", "application/json").body(cmntPayload ).log().all().filter(session).when().post("/rest/api/2/issue/{key}/comment").then().assertThat().statusCode(201).extract().response().asString();
//Add attachments
String responseAttach = given().header("X-Atlassian-Token","no-check").filter(session).pathParam("key", "ticketID").header("Content-Type","multipart/form-data").multiPart("file",new File("jira.txt")).log().all().when().post("/rest/api/2/issue/{key}/attachments").then().assertThat().statusCode(200);
Note :
- SessionFilter: It can be used to record the session ID returned from the server as well as automatically apply the session ID in subsequent requests.
Result
After Executing the above code, Go to your Jira Dashboard and you will see the result as shown in the image below:
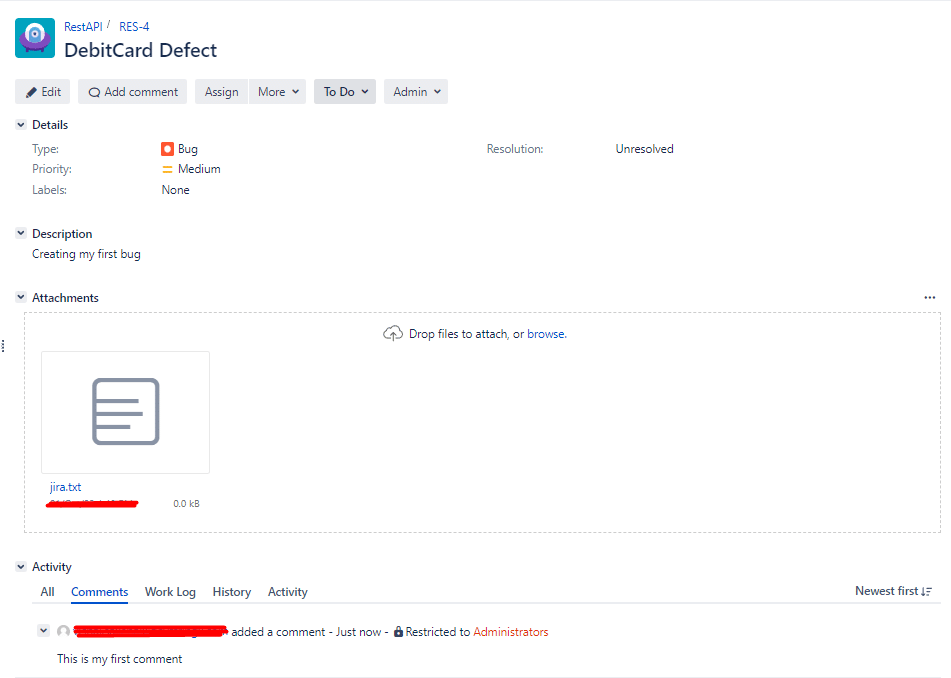
So, That’s how you will be able to create your first Jira ticket, add attachments to that, and add comments as well.
Related Post:-


