Steps to Integrate Selenium with JIRA
- Set up a Jira account and create an API token for authentication.
- Create a Maven project in your IDE, and add the necessary Selenium and Jira dependencies to your project’s pom.xml file.
- In your Java code, import the Jira Java library and use the API token to authenticate and establish a connection with your Jira account.
- Create a new issue or update an existing issue in Jira using the Jira API methods provided by the Jira Java library.
- Use Selenium to automate the test cases, and integrate Jira API calls into your test cases to create or update issues based on the test results.
- You can also add attachments or comments to the issue using the Jira API.
Once you have successfully integrated Selenium with Java and Jira, you can automate the process of creating or updating issues in Jira based on the results of your Selenium tests.
How to Raise a Bug In Jira by Using Selenium?
<dependency>

    <groupId>net.rcarz</groupId>

    <artifactId>jira-client</artifactId>

    <version>0.3</version>

</dependency>
- Open the JIRA login page
- Login to Jira with valid credentials
- Navigate to the project where you want to raise the bug ticket.
- Create a new issue.
- Enter the necessary information for the bug ticket, such as summary, description, -priority, and severity.
- Click on Create to submit a bug ticket.
- Verify that the bug ticket has been created successfully.
Steps to Generate API Token in Jira
- Navigate to Jira website (ex: https://example.atlassian.net/)
- Login with credentials
- Click on Profile and Settings
- Click on Account Settings
- Click on Security. Then, click on Create and Manage API tokens Link
- Enter the Label and click on Create
Note: Replace “jira.example.com” with your JIRA instance URL and “PROJECT_KEY” with the key of your project. Also, replace “your_username” and “your_password” with your JIRA login credentials. Finally, replace the IDs of the elements (e.g., “summary”, “description”, “priority-field”, “customfield_12345”, etc.) with the actual IDs of the elements in your JIRA instance.
Good to Read:- How to Create Jira Ticket in Java Using Rest Assured?
How to Get the Jira Token?
Here on the Jira service provider – we need to pass the Jira URL, along with the Jira username and Jira token, you can get the Jira token
Below is Selenium Code
@BeforeClass(alwaysRun = true)

   public void setUp() throws Exception {

        File chromedriverExecutable = new File("Chrome Executable path");

        System.setProperty("webdriver.chrome.driver", chromedriverExecutable.getAbsolutePath());

        driver = new ChromeDriver();

        baseUrl = "https://admin-staging.mytyles.in/";

        driver.manage().timeouts().implicitlyWait(30, TimeUnit.SECONDS);

    }

//Custom annotation is explained in the following sections

    @JiraCreateIssue(isCreateIssue=true)

    @Test

    public void verifyHomepageHeaderText() throws Exception {

        driver.get(baseUrl);

        WebElement el = driver.findElement(By.xpath("//p[1]"));

        assertEquals(el.getText(), "Log in to Facebook Admin");

}
How to Create a Jira Issue?
public void createNewJiraIssue(String issueType, String summary, String description, String reporterName) {

        try {

            //Avoid Creating Duplicate Issues

            Issue.SearchResult sr = Jira.searchIssues("summary ~ \""+summary+"\"");

            if(sr.total!=0) {

                System.out.println("Same Issue Already Exists on Jira");

                return;

            }

            //Create an issue if not exists

            FluentCreate fleuntCreate = Jira.createIssue(project, "Bug");

            fleuntCreate.field(Field.SUMMARY, summary);

            fleuntCreate.field(Field.DESCRIPTION, description);

            Issue newIssue = fleuntCreate.execute();

            System.out.println("********************************************");

            System.out.println("New issue created in Jira with ID: " + newIssue);

            System.out.println("New issue URL is :"+JiraUrl+"/browse/"+newIssue);

            System.out.println("*******************************************");

        } catch (JiraException e) {

            e.printStackTrace();

        }

    }

}
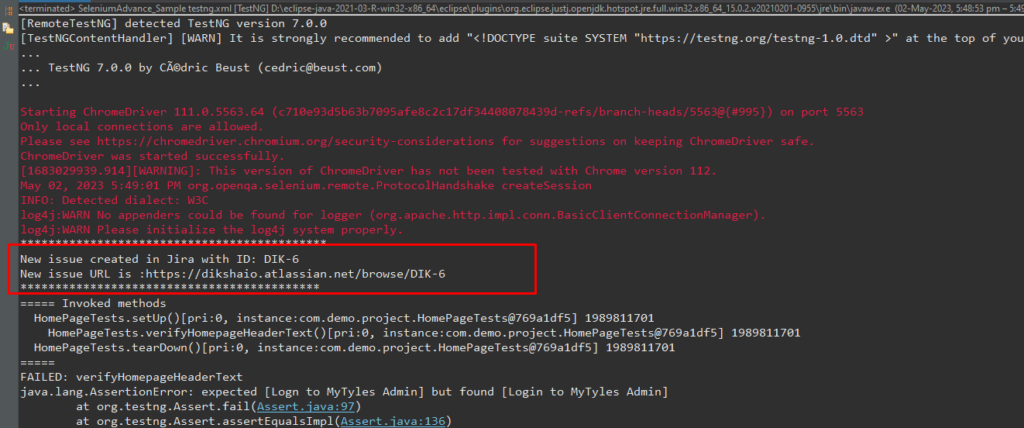
Console Screenshot
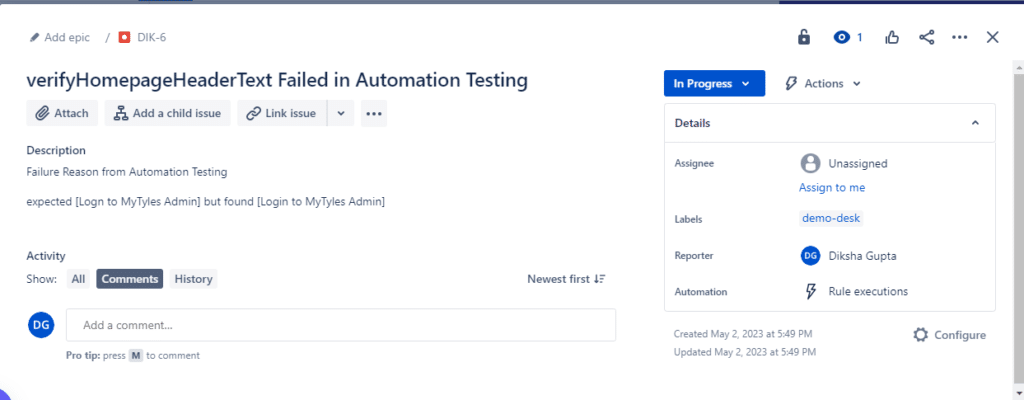
Screenshot For Bug Created In JIRA