Brief description of Talend Open Studio:
- # Talend Open Studio is a powerful open-source ETL tool that solves some of the most complex data integration challenges.
- # It is a job designer and Eclipse-based developer tool and We just need to Drag and Drop Talend components and connect them to create and run ETL Jobs.
Working with CSV File:
In this section, let us understand how to work on Talend projects( Reading CSV File using Talend components )
Pre-requisites:
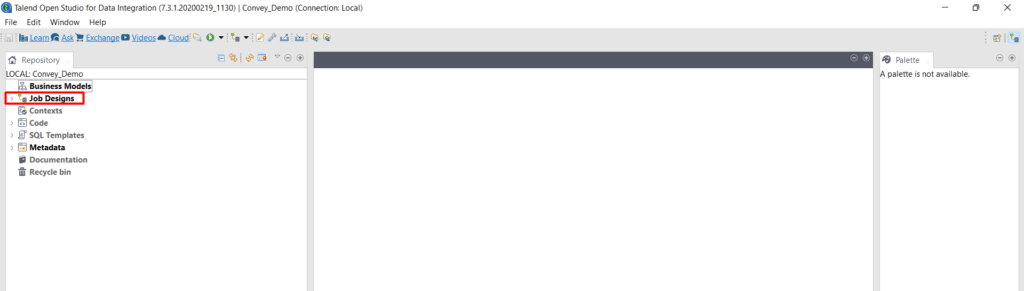
- # Create a local repository in your Talend studio.
- # Once you have created a Local Repository follow the below steps to successfully read a CSV in Talend Open Studio
- At First, Click on the Integration perspective on the extreme right side.

2. Now on the left-hand side, the Menu will appear as below. Select Job Design on it:
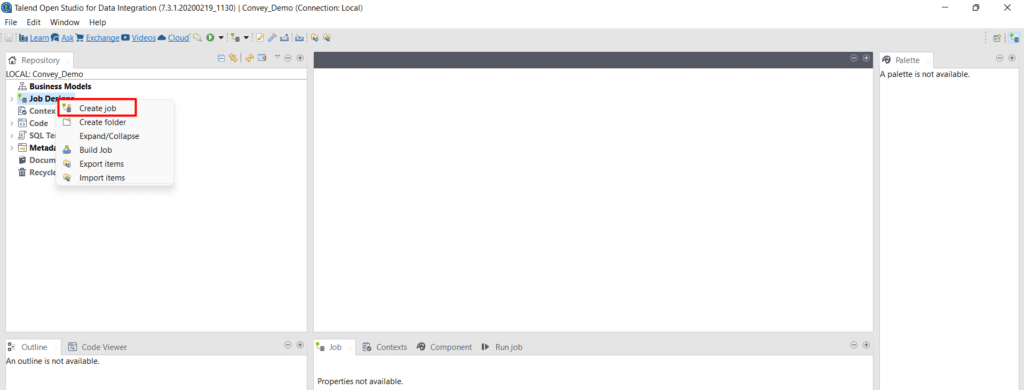
3. Now right-click on it and you will see a drop-down menu will appear, on which you will have to create a Job, for which select the Create Job option:
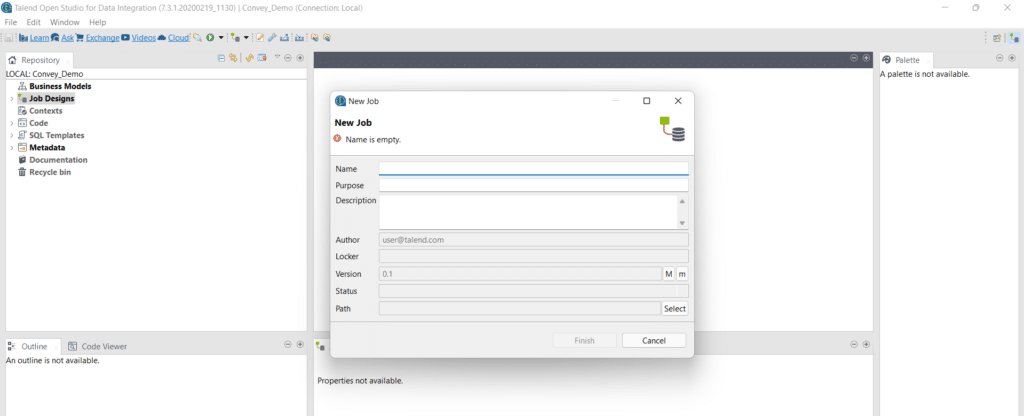
4. Fill in the required information as per your job need. In this case, we are creating a Job to read a CSV File so fill the below details in it accordingly:
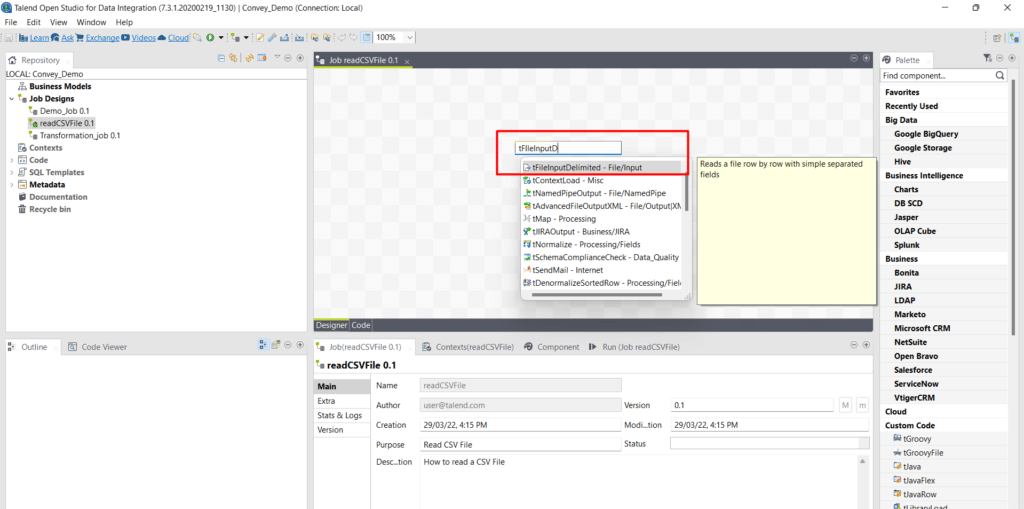
5. Now, use the Delimited/simple separated file Input type by adding the tFileInputDelimited component on the container on the right side. This component is used to contain the input CSV file which we are reading:
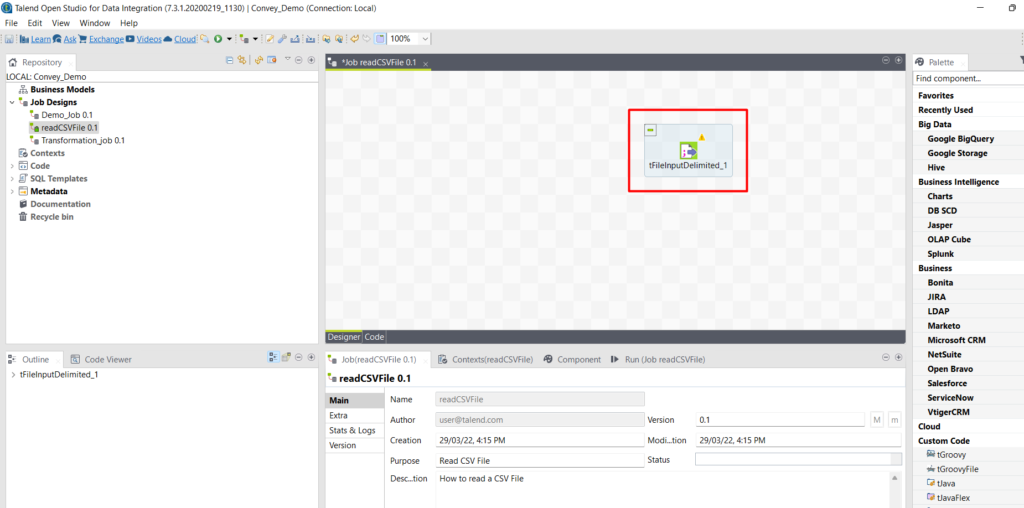
This is how it will Show once added:
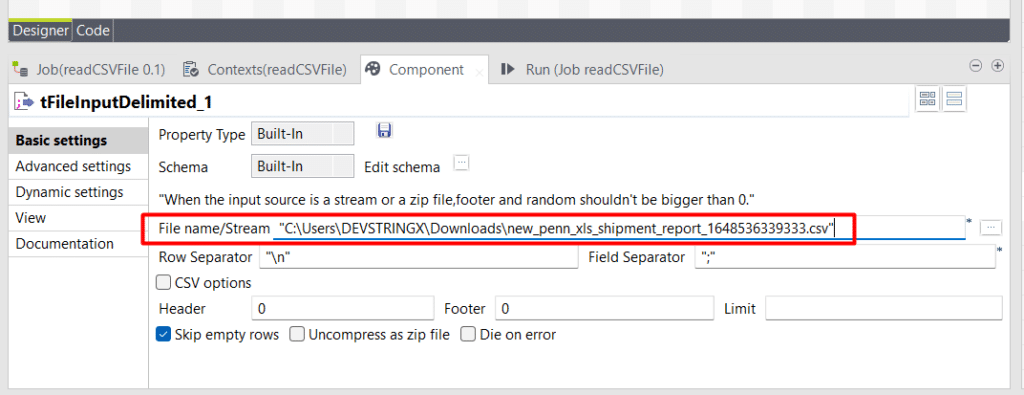
6. In the below section, select Component on it. Now enter the name of the File which you want to take as CSV input. Here, in this case, I have added the path to my sample CSV file.
Read Also:- Read & Write Data Using Apache POI – JAVA
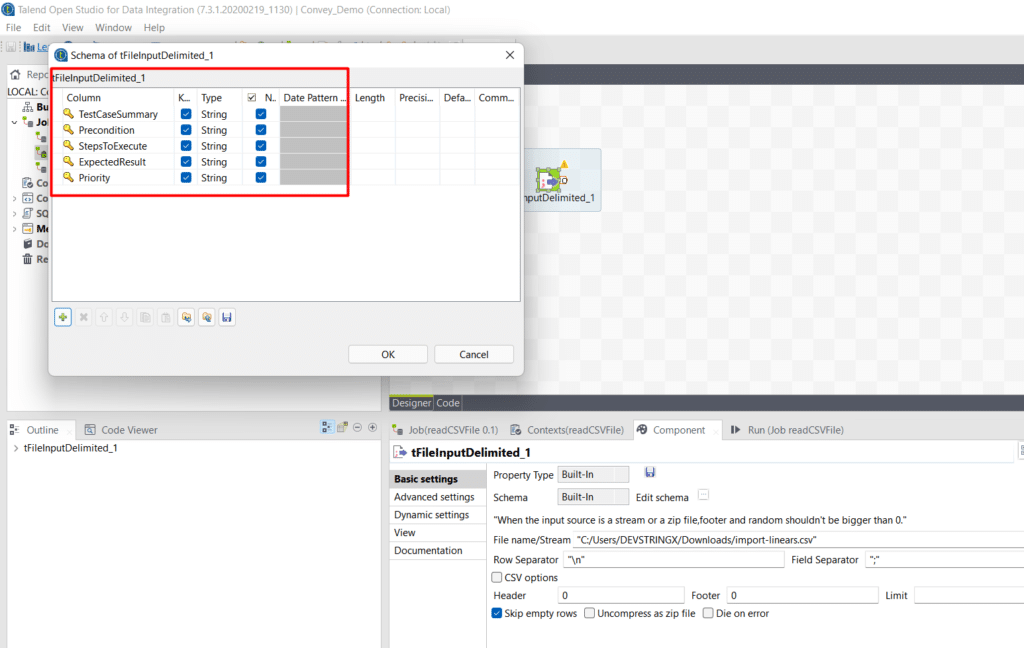
7. Once you entered the Input CSV file in the Talend component, You need to Edit the Schema of the input table. Select the Edit Schema button, where you have entered the file name

8. A new window will open and you need to enter the schema as per the CSV you are providing as input. If you want to add the new schema then use the “+” to add a new column to the schema. Add all the columns one by one as per the input CSV
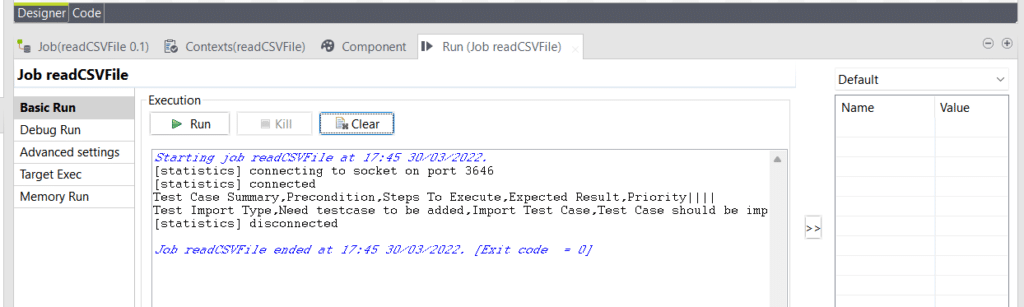
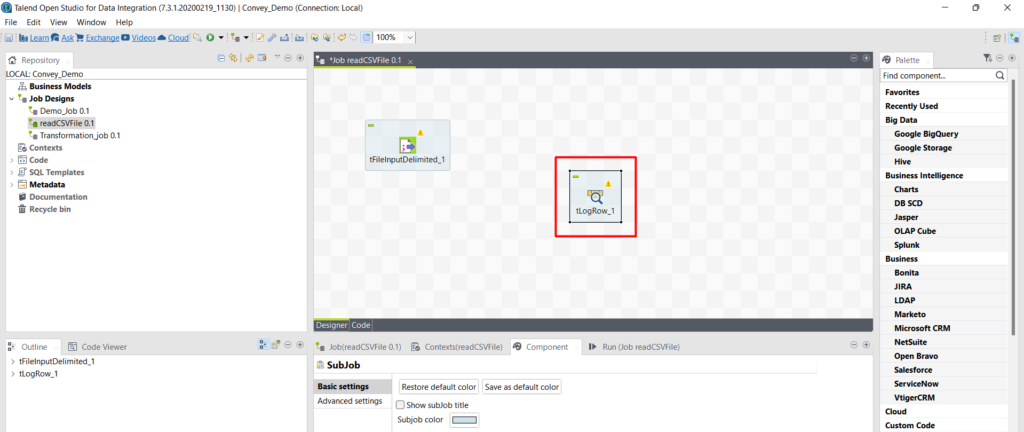
9. Now add one more component which is tLogRow, This is used to display the flow content on the Run Job Console.
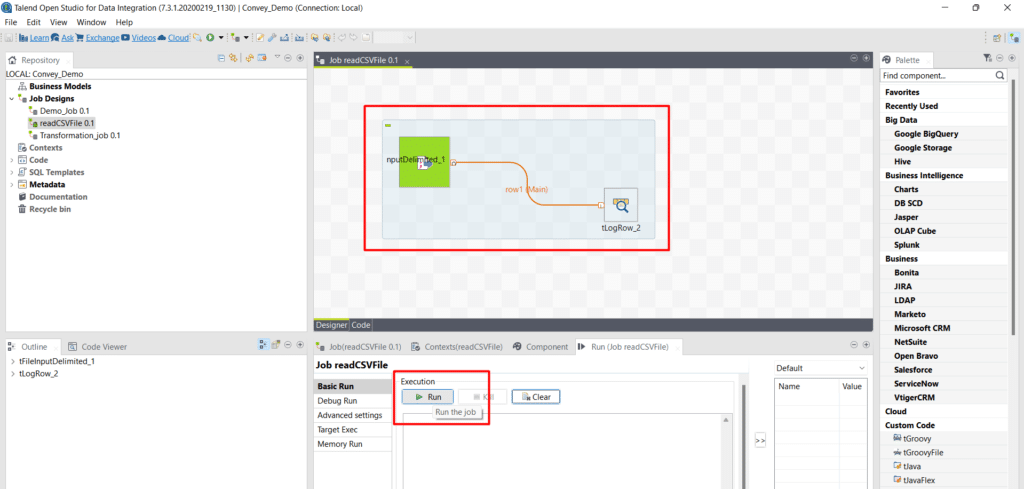
10. Now connect both components by dragging the connection in between the two. And then Adjacent to the Component tab, select the Run option.
Read Also:- Guide On Behavior Test-Driven Development
Once done, Here is the successfully ended Job, that reads data from CSV to Talend OS.