
Introduction:
XRAY is a JIRA add-on that provides a comprehensive solution for managing test plans, test cases, and test executions within the familiar JIRA environment. It extends JIRA’s capabilities by enabling teams to incorporate testing into their Agile processes, ensuring that every feature or bug fix meets the required quality standards.
Step 1: Install Xray
Install the Xray Management from the Atlassian Marketplace. Once installed, Xray will add new issue types such as Test, Test Set, Test Execution, and Test Plan to your JIRA instance.
Step 2: Create a Test Case
- Go to the JIRA project.
- Click on the Create button and select the issue type as Xray Test.
- Fill in the required details:
- Summary: Title of the test case.
- Description: Brief title of the test case.
- Actions: Step-by-step instructions for the test.
- Expected Result: Choose Manual or Automated based on the test case.
- Save the test case.
- After saving the test case, you can see the test details button for the test case then you can add steps for the testcase, i.e Actions, Expected Result, TestData etc.

Step 3: Organize Tests into Test Sets
Test Sets allow you to group related test cases for better organization. To create a Test Set: 1. Click on Create button and select Test Set as the issue type.
2. Attach the desired test cases to the Test Set by adding them under the Test field.

Once you install the Xray Management in Jira, then you can see the Testing Board button on the left panel. Once you click on it then you can see the “Test Sets” button, once you expand it, you can create a “Test Set” by clicking on “Create Test Set”, you can add test cases into that Test Sets.
Good to Read:- How to Create Jira Ticket in Java Using Rest Assured?

Step 4: Execute Tests
To execute test cases,you have to create a Test Execution issue:
- Select Test Execution as the issue type.
- Attach the Test Set or individual Test Cases.
- Assign the execution to a team member and track the progress.
Once you create the “Test Sets” then you can create “Test Execution” and you can add all “Test Sets”into the Test Execution .

Step 5: Track Results and Generate Reports
Use the Xray dashboard to view:
- Execution results for individual tests.
- Test coverage for requirements or stories.
- Detailed test run analytics.
Customizable gadgets can be added to your JIRA dashboard for real-time monitoring.

Once you click on the view on board then you will navigate to the dashboard and can see the details of the TestExecution.

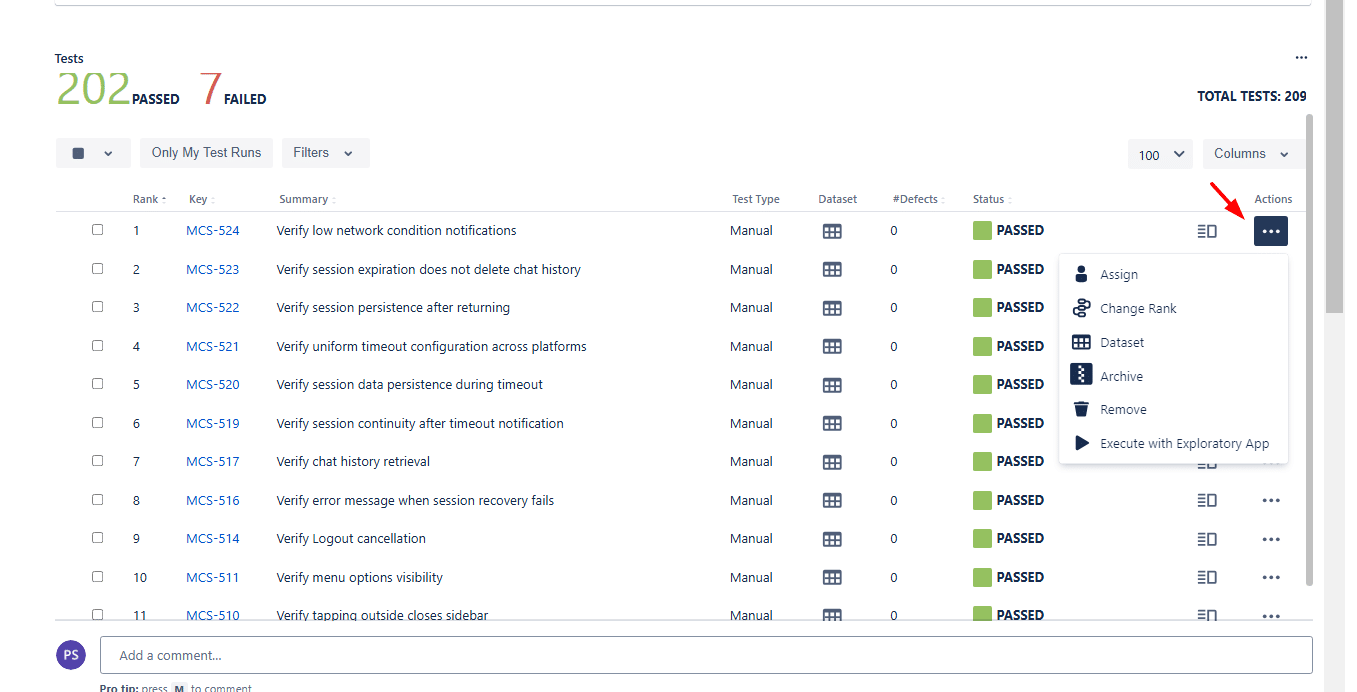
You can mark tests status by clicking on the status Icon for each testcases

You can filter out the Testcases from the Test Executions by clicking on filters

By clicking on Actions you can perform multiple actions like- “Remove”, “Archive”, “Assign” etc.
By clicking on Hamburger Icon, you can see all the lists i.e, test Set list, test Execution list etc.


Conclusion
Xray transforms JIRA into a powerful test management solution, enabling teams to manage test cases with ease and efficiency. By integrating testing into your existing workflows, Xray ensures that quality is embedded into every stage of development. Whether you’re working in agile or waterfall methodologies, Xray provides the tools needed to deliver robust, reliable software.


