
While doing development there might be a situation when we need to create a webhook that can be only created on a live server or we need to show our project to some but the problem is that you don’t have a live server.
To solve that problem we have Ngrok that makes it possible to access our localhost project over the internet. So In this tutorial, we are going to learn how we can configure Ngrok and create Trello webhook on our local project.
What Is Ngrok and How Does It Work?
Ngrok is a free application that provides the functionality to access local projects over the internet. It asks for the port number on which your project is running and opens a tunnel to point the project running on the given port.
Install and Configure Ngrok
We can install Ngrok with NPM or download and install it manually. Let’s do it one by one.
With NPM
- Before installing Ngrok make sure that you have already Nodejs installed in your system.
- Open Terminal/cmd and run “npm install –g ngrok”. This will install Ngrok globally on your computer.
Install Manually
- Visit https://ngrok.com/download and download Ngrok corresponding to your operating system and unzip the package to any directory.
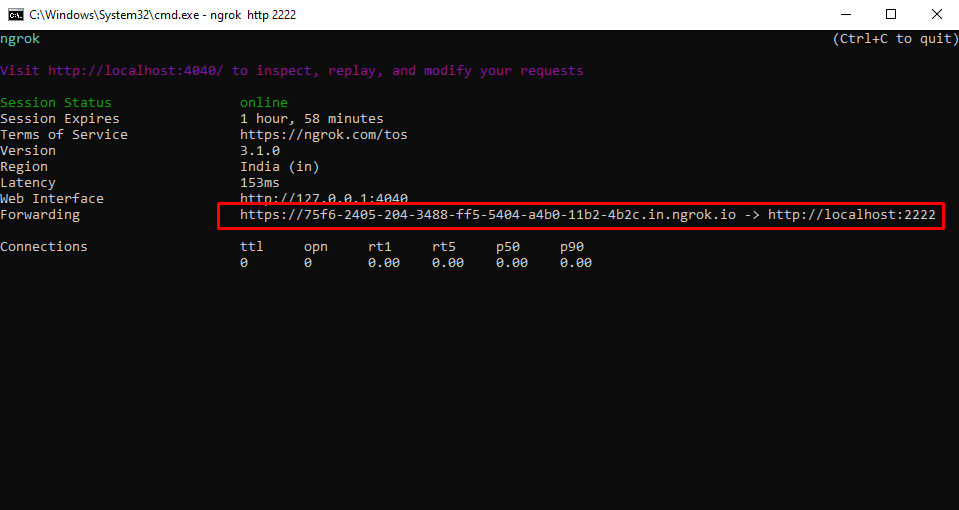
After downloading the Ngrok package, we need to run the below command in the terminal to start ngRok
(If you have downloaded ngrok manually, You need to open the terminal and navigate to the ngRok package directory)
“ngrok http 2222”
This command will open a tunnel to localhost port 2222. Press Ctrl + C to quit ngRok.
Create Nodejs Application
We need an API for creating webhook and triggering Trello card changes. So Let’s create a Nodejs project and an API with the help of Expressjs.
Create a new Nodejs project and install express and cors packages
- Npm install express
- Npm install cors
Open your project server file and paste the below code
const express = require('express');
const cors = require('cors');
const app = express();

app.use(cors());
app.use(express.json({
    extended: false
}))
app.use(express.urlencoded({extended: true}))

app.use(function (req, res, next) {
    if (req.method == 'HEAD') {
      return res.status(200).json({
        'error': false,
        message: 'success'
      });
    }
    res.header('Access-Control-Allow-Origin', "*");
    res.header('Access-Control-Allow-Headers', 'Content-Type,Authorization');
    res.header('Access-Control-Allow-Methods', 'GET, POST', 'HEAD');
    next();
  });

app.post('/getCardChanges',async(req,res)=>{
    console.log(req.body);
});

app.listen(2222,()=>{
    console.log('Server running on PORT: 2222');
})
Creating Trello Webhook
We have already created our publicly accessible URL with Ngrok. Now we will create a webhook on Trello to trigger card changes on our “/getCardChanges” API
Before creating a webhook, please make sure you have an API key, token, and idmodel(id of the Trello object on which we want to create a webhook).
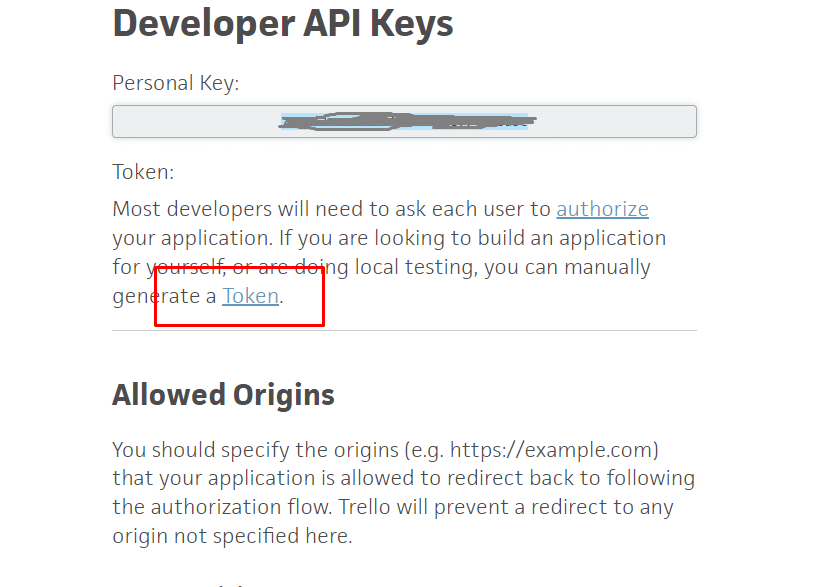
Get Trello Api key, Token and IdModel
To get the API key and token visit https://trello.com/app-key
Next, we need the board id, Goto Trello dashboard, and open board on which you want to create a webhook, copy the page URL which looks like
- “https://trello.com/b/rZmuE7dV/<your board name>”
Add “.json” at the end of your board URL
- https://trello.com/b/rZmuE7dV/<your board name>.json
You will get a JSON, which contains the id of your board.
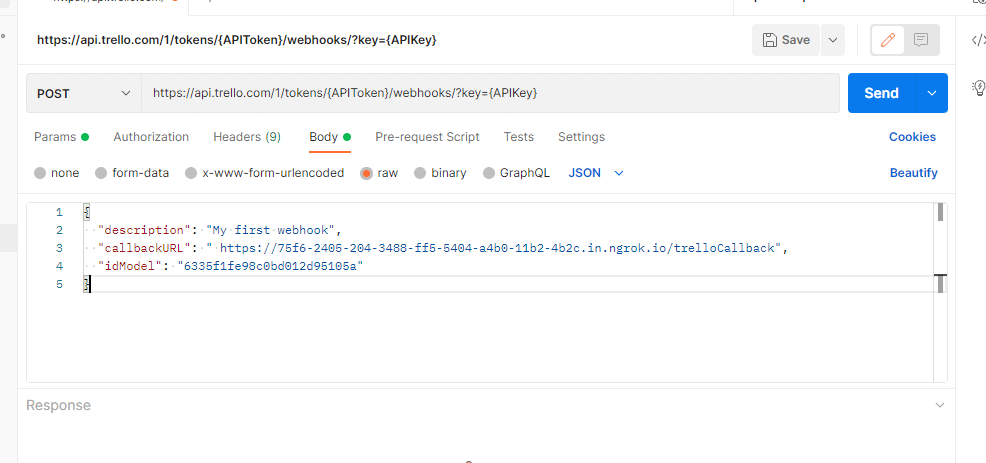
Now we have all the necessary things, we need to create a webhook. So let’s create our first Trello webhook
- Open Postman and add a post request
- Paste https://api.trello.com/1/tokens/{APIToken}/webhooks/?key={APIKey} in the URL and replace the API token and key with your own
- In the body paste below JSON
{

  "description": "My first webhook",

  "callbackURL": "<your idmodel>/trelloCallback",

  "idModel": "6335f1fe98c0bd012d95105a"

}
After all, is done, hit the API and your webhook will be created. Now you are able to trigger the changes on your “/getCardChanges” API.
Create a card in your board and your API will be triggered with JSON, You can see the JSON on your console.
If you are interested in even more development-related articles and information from us here at Devstringx, then we have a lot to choose from for you.


